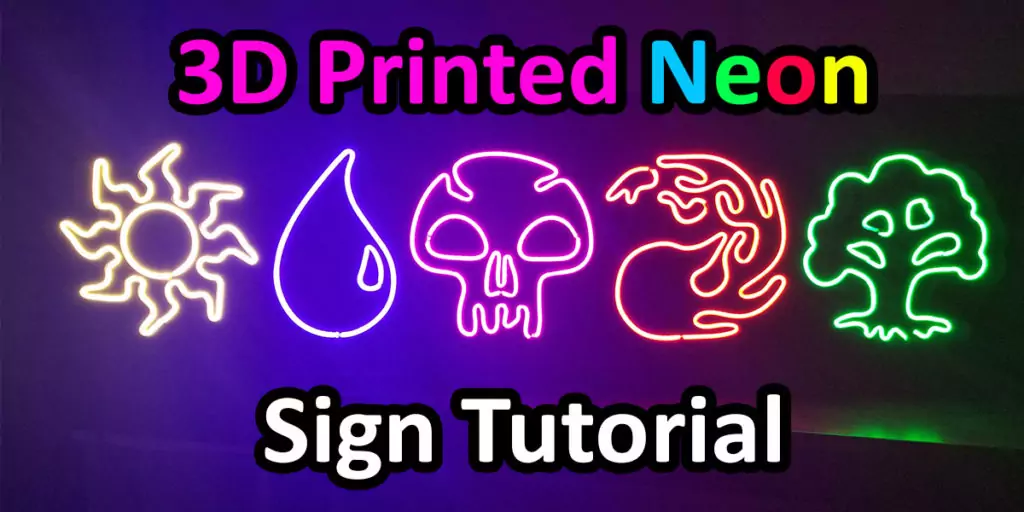
Are you looking to make an awesome 3D printed light? How about building a custom made 3D printed neon sign? By utilizing some rope LED strips, creating a 3D printed neon sign shell, and a bit of soldering, you can have your own custom neon sign!
Learn how to easily design your own custom 3D printed neon light shell model and build yourself a totally unique 3D printed light. Follow along as we go through the entire process by first designing the 3D model in Fusion 360. Once the model is designed and printed out, we will gather all the materials and finally assemble the 3D printed neon sign!
Table of Contents
This post contains affiliate links, which means I may receive a small commission, at zero cost to you, if you make a purchase through a link.
My Custom 3D Printed Neon Sign
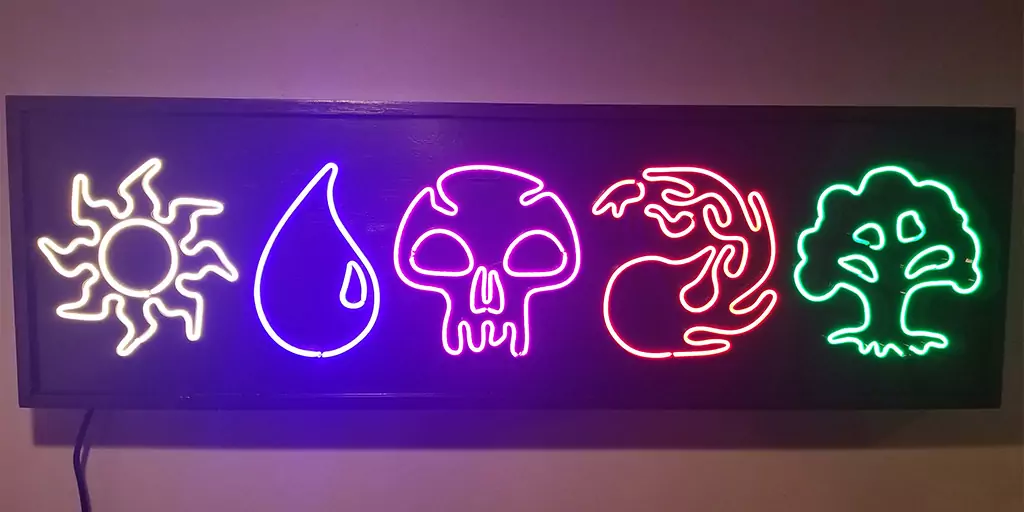
I am a big fan of Magic the Gathering, so I wanted to create myself an MTG neon sign. Roughly 50 hours of work later, this beautiful monstrosity was born! Each individual 3D printed light is roughly 10 inches tall and just barely fit on my 3D printer’s bed. The entire display is built from a custom wooden frame I made that measures 52 inches wide by 16 inches tall by 3.5 inches deep.
The back of the display piece houses all the wiring and the power supply with the main power cord slipping out of the bottom (image below of the backside). The reason I bring this up is because I will be referencing this piece throughout this article. For example, each individual 3D printed light uses less than 3 Amps total, and the first two use less than 2 Amps each. So I can use this information to determine the wire and power supply I would need for this specific project.
While the scope of my particular project may be overkill for most, I do want to share my method of creating the individual 3D printed light pieces so you can build your own. I will have my designs freely available to download. You can find those links towards the end of the article. But, more importantly, I created a video to show how you can take your own image(s) and create a 3D printed neon sign shell to build your own custom neon sign!
Tutorial: Design Your Own 3D Print Neon Sign
If you are interested in designing your own 3D printed neon sign, you will first need to have a shell of the shape/design you want that the LEDs will reside in. I have created a tutorial using Fusion 360 that will show you how to turn an image into a 3D model suitable for your 3D printed light. To start, you will need to have Fusion 360 installed. Thankfully, there is a Free (non-commercial) Version available. You will just need to create an account and you should be good to go! Follow along with this tutorial and you’ll be designing your own 3D printed light shell in no time!
Printing Your 3D Printed Light Shell
After you have finished your 3D printed light shell model, you will need to print it out. I highly recommend using PETG when printing out your shell(s). This is because PETG can handle any heat the LEDs generate without warping or becoming deformed. Also, the flexible nature of PETG will help with placing the LED strips inside of your shell. The shells are designed to snugly fit the LED strips in them and the extra flexibility can help with tight corners and curves. PLA might work, but it is much more stiff and starts to deform at just 60c-65c!
In terms of the actual print settings, I have never needed to use a brim for any of my 3D printed neon sign shells. I have printed six unique ones so far and have not had any warping/adhesion issues without a brim. I also used a standard 0.4mm nozzle and a 0.2mm layer height for my prints. The shells don’t need to be printed at a super high quality, as the lights are the main focus and the shell will not be all that visible when the lights are on. After your 3D printed light shell has been printed out, we can start the actual build process.
Building Your 3D Print Neon Sign
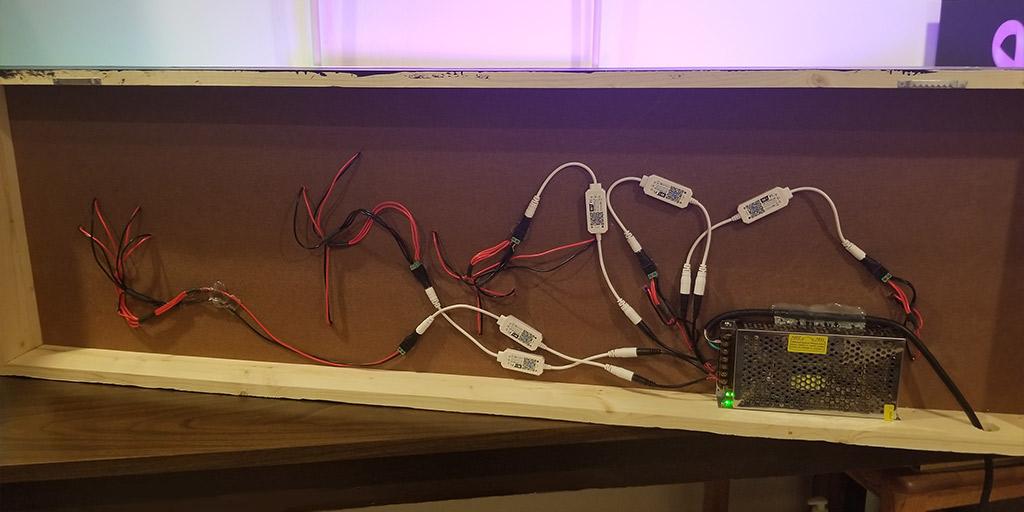
Once you have a 3D printed neon light shell, you will need to actually build it. Depending on the size of your 3D printed light, you will need to find an appropriate power supply, and of course, the LEDs themselves. The above photo shows the backside of my 3D printed neon sign with all the wiring for each individual 3D printed light. Since my project was rather large, I needed a 15 Amp power supply. To start off your 3D printed neon sign build, you will need to gather all of your materials.
A Couple of Questions to Ask Yourself
Before getting all the materials and supplies for your 3D printed neon sign, there are a few questions you need to ask yourself.
Do You Want Your 3D Printed Light to be Multiple Colors?
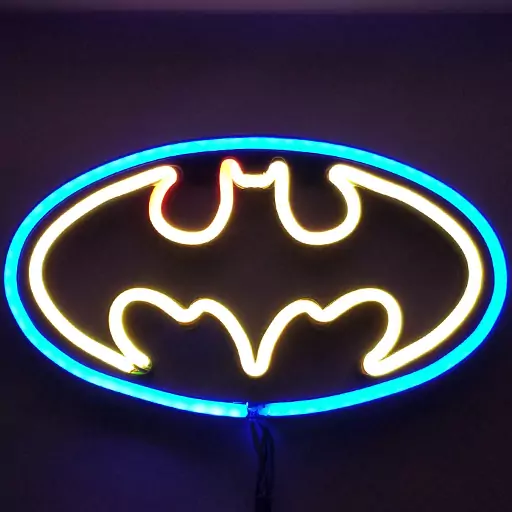
The LEDs being used for this project are single color strips. This makes the wire management and soldering much easier since single color strips only have two pads (+ and —) on them, whereas RGB lights typically have four pads on them (G, R, B and V+). Also, single color rope LED strips are cheaper (per m/ft) than individually addressable RGB rope LED strips.
Despite that, you can mix and match colors within your design by utilizing sections from multiple LED strips. As shown in the photo, I use a mix of a blue LED strip and a portion of a yellow strip to create a two colored neon sign! The best part is the amount of effort/work is exactly the same, regardless of how many colored strips you use. As the Batman neon sign shows, two different strips need to be wired up for this particular design. The color of each of those two strips does not matter.
Do You Want Your 3D Printed Neon Sign to Have WiFi?
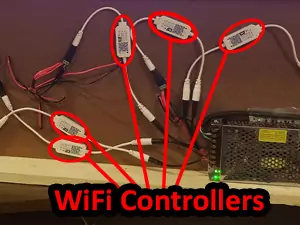
One of the goals I had for my 3D printed neon sign display piece was for it to have WiFi so I could control it from my phone or through Alexa. So, before you have sourced all of your materials and tools, you’ll need to figure out if you want your 3D printed light project to have WiFi as well.
One of the easiest ways to achieve this functionality is to use a simple LED WiFi controller. These controllers are made for LED strips that only have two pads on them, + and —.
They are very simple to connect since they have DC barrel jack connectors on them. Functionality wise, theses controllers provide you with the ability to turn the LEDs on and off, make them flicker/blink and control the brightness!
I created a ‘Shorts’ video that shows off the features these WiFi controllers give you if you want to see them in action: 3D Printed Neon Sign Demonstration. Off camera, I am using an app on my phone to make the lights turn off and on while also making them brighter/dimmer.
The 3D Printed Light Parts & Supplies
Whether you downloaded one of the shells I created, or created your own shell using the tutorial linked above, you will need some rope LED strips. The shells are made for LED strips that are 12mm tall and 6mm wide. The LED strips will sit a bit snug in the shell’s channels and create a friction fit, so no need for glue, tape, or any other adhesive! This is also one of the main reasons to use PETG for your 3D printed neon sign shells since it is much more flexible compared to PLA.
Materials
These are all the materials you will need. The amount of LEDs your 3D print neon sign will use will determine what type of wire you need along with the amount of amperage your power supply will need to be capable of producing. While the recommendations I provide below should suffice, please read below to figure out, specifically, which of these your neon sign project will need.
Lastly, when it comes to power supplies, a good rule of thumb is having a higher rated one is not a problem (in terms of its Amps). However, having a lower rated one is a problem. The LED strips will request the amount of current they needs and the power supply will then supply however much current is being requested. If you’re amperage needs are on the fence between two, always go for the larger one.
- 12v Rope LED Strip – 5 meters/16.4 feet in length (offered in many different colors)
- Cold White (fluorescent-ish color)
- Warm White (yellow-ish color)
- Red
- Green
- Blue
- Light Blue/Ice Blue
- Purple
- Pink
- Orange
- Yellow
- Power Supply
- 12v 2 Amp Power Supply – Good for 1/3 of an entire strip or less
- 12v 3 Amp Power Supply – Good for 1/2 of an entire strip or less
- 12v 4 Amp Power Supply – Good for 2/3 of an entire strip or less
- 12v 5 Amp Power Supply – Good for an entire strip
- 12v 15 Amp Power Supply – Good for larger projects, such as my display mentioned above
- Power Cord – I used this power cord for my power supply on my display as it is long (9ft) and very thick (16 AWG)
- 12v 60 Amp Power Supply – Good for HUGE projects – Also needs a Power Cord, like the 15 Amp Power Supply, mentioned above
- Female DC Barrel Jack Connectors – Some power supplies may come with one as a freebie
- LED WiFi Controller for Single Colored LED Strips (optional)
- Each WiFi controller can handle 90 Watts which is roughly 7.5 Amps
- That is why I am using 5x of these for my entire 3D printed neon sign – 1x for each individual light
Consumables
This is the collection of consumable parts you will need. If you’re planning to make multiple 3D printed neon signs, these consumables should last you a long time! To put it into perspective, my 3D printed neon sign with the 5 individual 3D printed light pieces only used about 20 feet total of wire, excluding the main power cord.
- 22 AWG Stranded Wire
- 63-37 Solder
- Heat Shrink Tubing (optional)
- Heat Shrink Solder Tubes (optional)
Tools
In regards to the required tools needed for this 3D print neon sign project, the list is rather small. All you really need is a soldering iron and some wire strippers. A pair of wire cutters may be needed if your strippers lack the ability to cut wires. Also, a pair of tweezers can be very beneficial.
- Soldering Iron (this TS101 Soldering Iron is ultra compact and amazing, if you’re in the market for a soldering iron)
- Self Adjusting Wire Strippers / Manual Wire Strippers
- Hair dryer, heat gun, lighter, torch, etc. to shrink the heat shrink tubing if you’re using it
- Small screwdriver for attaching the DC barrel jacks
- Tweezers (optional but very helpful for pulling wires through the 3D printed neon sign shell)
Determining the Power Supply & Wire for your 3D Printed Light
The above materials and parts will work if you’re planning to use an entire LED strip or less (5m/16ft) without issue. If you have a much larger project planned, you will need to do some calculations to make sure your power supply and wire will work for you.
Based on the above linked 12 volt rope LED strips, each meter of the LED strip has a total of 120 LEDs per meter. These LED strips require roughly 1 Amp of power per meter. Unless you are not planning for a single strand of LED strip to be longer than an entire 5m/16.4ft strip, 22 AWG wire should be fine, assuming you’re not running super long lengths of wire. *
If you’re unsure about what gauge wire to use, try out this Wire Gauge Calculator *
If you’re unsure about what power supply to use, try out this LED Strip Amperage Calculator *
* Please note, the provided information is based on the rope LED strips linked above, which are 12 volts and 120 LEDs/meter. If you use a different brand/type, you will need to base any calculations on their specs and not the ones provided here. Regardless, I would highly recommend double checking and verifying these calculations based on your specific project and the exact amount of LEDs that project will use. Just as a safety and sanity check for yourself.
Assembling the 3D Printed Light
I’d recommend skimming through this entire section before actually starting to assemble you 3D printed light. Just to get familiar with everything beforehand.
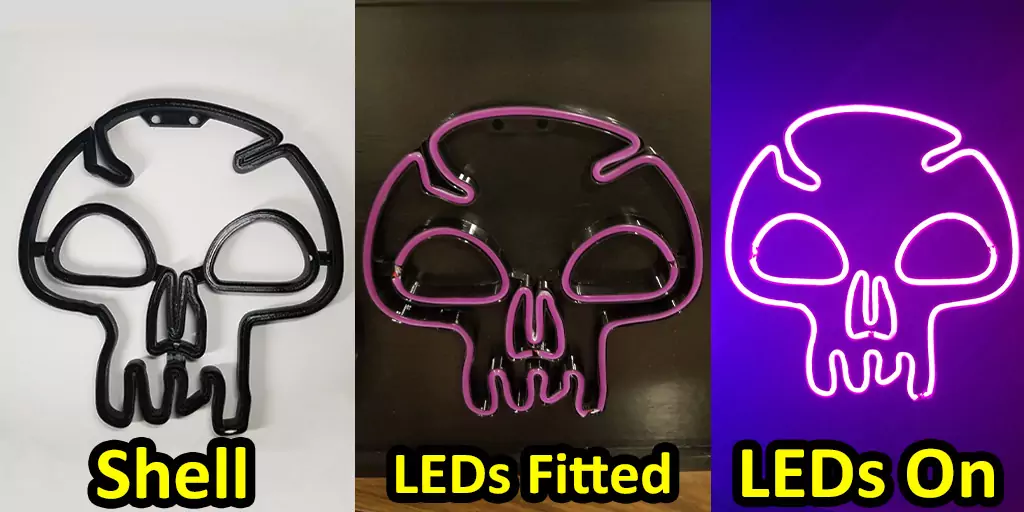
Now that you have acquired all of your project parts and have your 3D printed neon sign shell, you will want to do a dry fit all of your LED strips and cut them to the appropriate lengths. One thing to be careful of is to be sure to cut the LEDs on the cut indicator lines only! The linked LEDs above have cut indicator lines at every 1cm interval. In my example, the skull 3D printed neon sign has 4 individual pieces: the two eyes, the nose and the face outline. So I will need a total of four different lengths of LED strips.
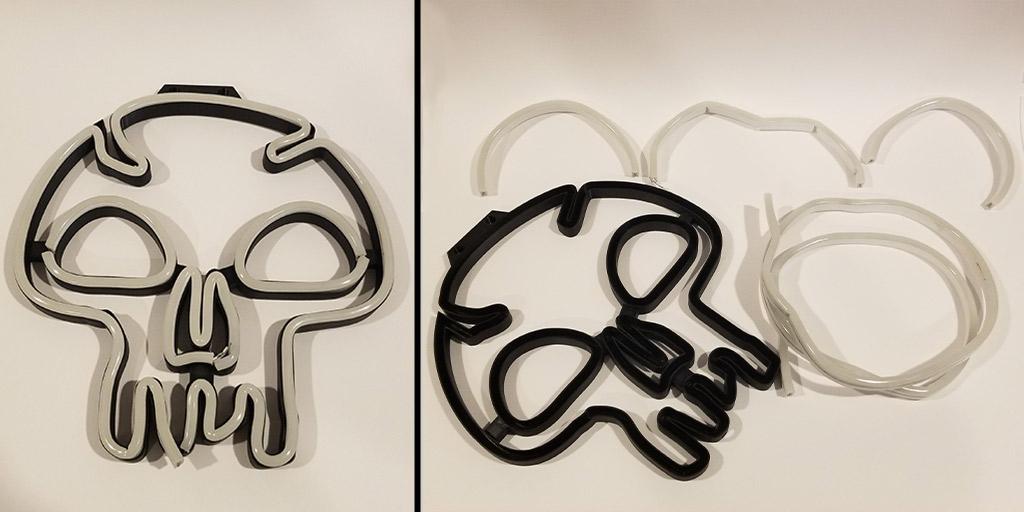
In terms of wiring each section, I would recommend working on one section at a time, leaving your overall outline as the last section to be completed. For my neon sign, that would be the face outline. To start, take your black and red wires and fish them through your 3D printed neon sign shell, starting with the termination hole and ending in the tunnel for whatever section you are working on. Please reference the image to see what I mean.
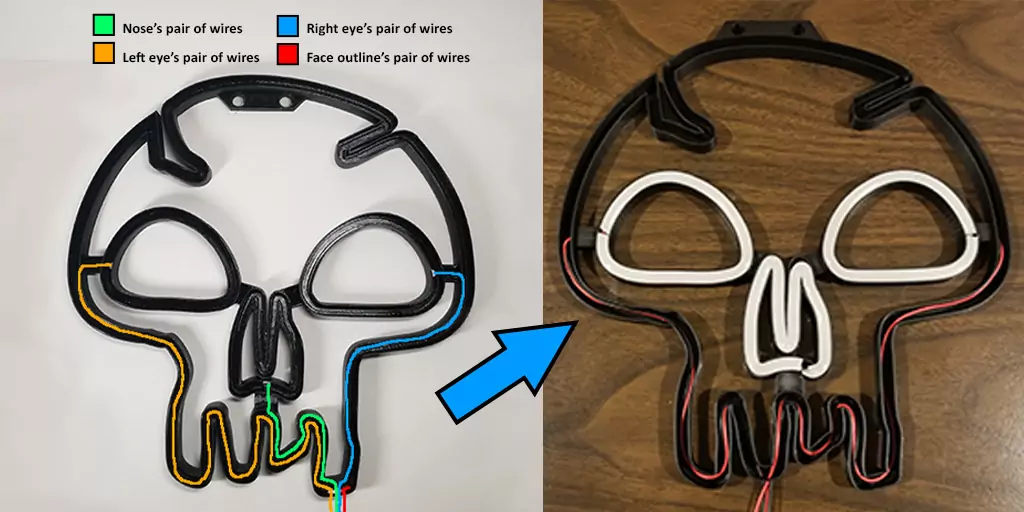
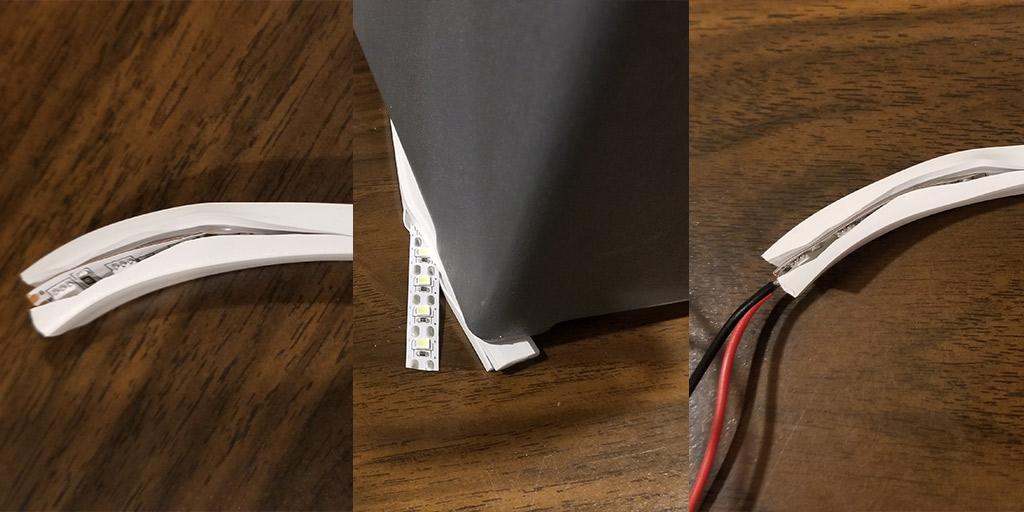
Then, take those fished through wires and give yourself some slack so you can solder them away from the 3D printed light shell. Very carefully, split your LED strip on the bottom a few inches. Make sure not to split it at the top as the top is where the LEDs shine through. Also, be careful to not slice the actual LED strip inside this silicone casing.
Once the strip is split, spread the two parts from each other and find something semi-heavy and place it on top of the silicone casing so you have easy access to the actual LED strip. This will let you solder your wires to the strip without accidentally melting the silicone casing. Check the photo below for reference.
Begin by taking the black wire and soldering it to the negative (—) pad on the LED strip for the section you’re currently working on. Do the same thing for the red wire, except to the positive (+) pad on the LED strip. Once you have both wires soldered, carefully stuff the LED strip back in the silicone casing with the wires hanging out from the end.
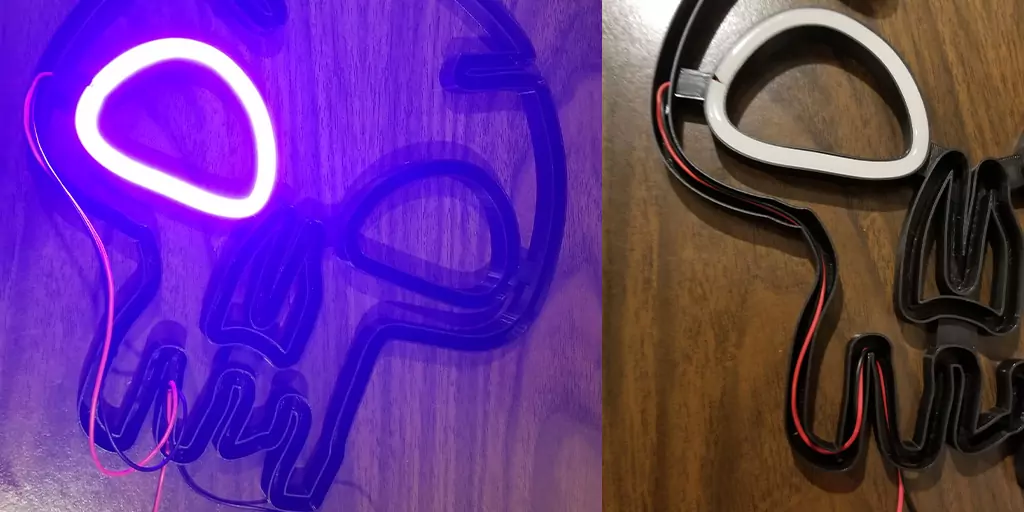
Start reeling back your wires and once all the slack is gone, start cramming the LED strip into the shell. At this point, the skull’s left eye section is complete. I would highly recommend that you test out your wired up strip by connecting the pair of wires to your female DC barrel jack and making sure it works as expected. Once you verify the lights on the strip work, go ahead and push the wires down as much as you can into the wire channels, as shown in the right of the photo below.
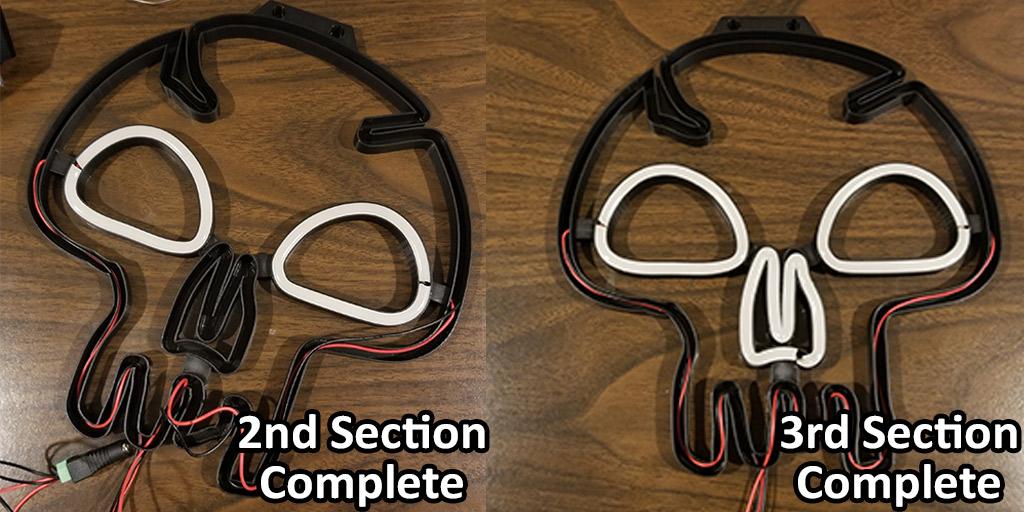
Disconnect the female DC barrel jack and repeat this process for however many sections you have remaining until the entire 3D printed neon sign shell is filled with LED strips. So for my 3D printed light, I would do the right eye next, followed by the nose and then finishing it off with the face’s outline.
After each subsequent section is completed, combine all the red wires together and then combine all the black wires together to connect the DC barrel jack connector to test it all out. Every single completed section should light up when testing. For example, in the left half of the photo below, both eyes should light up when testing. For the right half of the photo, both eyes and the nose should light up during the test.
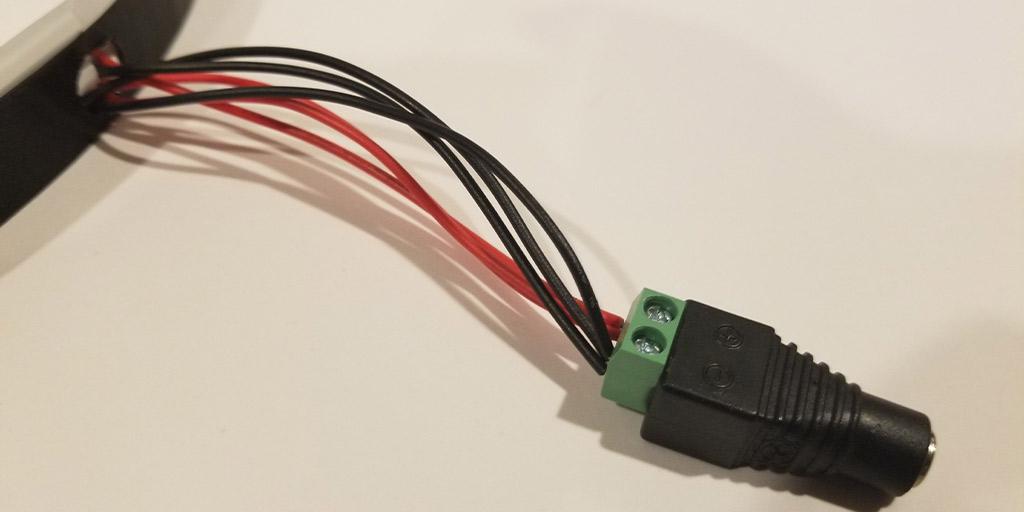
After all LED strips are connected and inserted into your 3D printed light shell, you will need to connect the DC barrel jack, permanently this time. Take all the wires coming out of your termination hole and cut them to the same length and strip them. Twist all the red wires together and twist all the black wires together as well. If you’re using heat shrink tubing, slip it over the wires now.
Finally, connect both bundles of wires to the DC barrel jack. Do this by loosening the screws and sticking the red bundle of wires into the + terminal and tightening the screw. You should be able to tug on the wires without them coming undone from the DC jack connector. Do the same thing for the black bundle of wires, except this time, stick them in the — terminal. After that, your 3D printed neon sign should be complete!
The only things left to do with your newly created 3D printed neon sign is to power it up and mount it somewhere for the world to see!
Download My 3D Printed Neon Sign Models
Here are all of the different 3D printed light shells I have created so far, fully assembled. These 3D printed neon sign shells all have termination/through holes on the sides of the channels, as well as the floors of the channels. This gives you the option to route your wires from the back, like I have done in the 5 light display piece, or through the shell and out the side. Each shell also has two mounting holes for hanging on a wall.
Batman Neon Sign Shell (1989 Style)

| Batman 3D Printed Light Download | Est. Print Time | Filament |
|---|---|---|
| Download for Bambu Lab Printers | 2-3 hours | PETG |
| Download for All Other Printers | ??? | PETG |
Pokemon Pokeball Neon Sign Shell
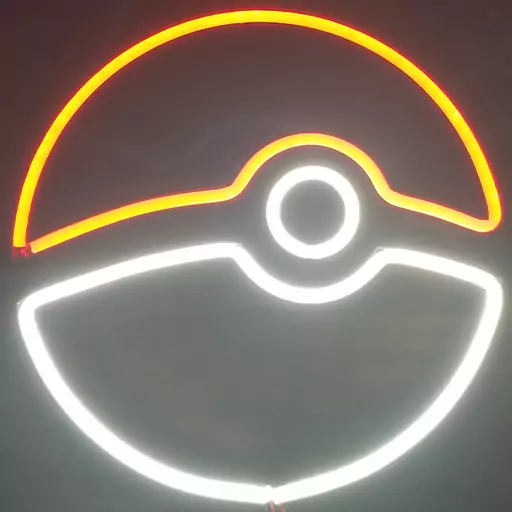
| Pokeball 3D Printed Light Download | Est. Print Time | Filament |
|---|---|---|
| Download for Bambu Lab Printers | 2-3 hours | PETG |
| Download for All Other Printers | ??? | PETG |
Plains MTG Neon Sign Shell
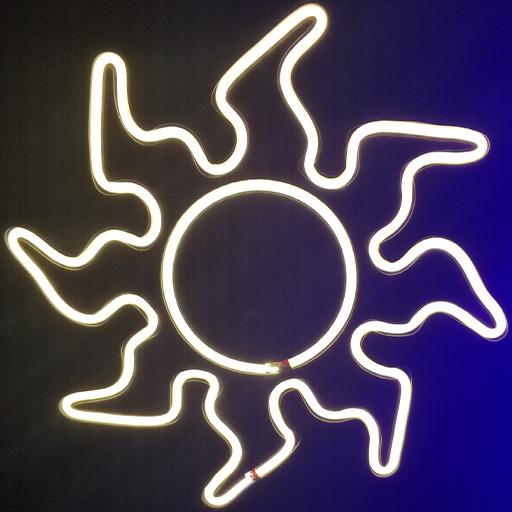
| MTG Plains 3D Printed Neon Sign Download | Est. Print Time | Filament |
|---|---|---|
| Download for Bambu Lab Printers | 3-4 hours | PETG |
| Download for All Other Printers | ??? | PETG |
Island MTG Neon Sign Shell

| MTG Island 3D Print Neon Sign Download | Est. Print Time | Filament |
|---|---|---|
| Download for Bambu Lab Printers | 1-2 hours | PETG |
| Download for All Other Printers | ??? | PETG |
Swamp MTG Neon Sign Shell

| MTG Swamp 3D Printed Light Download | Est. Print Time | Filament |
|---|---|---|
| Download for Bambu Lab Printers | 3-4 hours | PETG |
| Download for All Other Printers | ??? | PETG |
Mountain MTG Neon Sign Shell
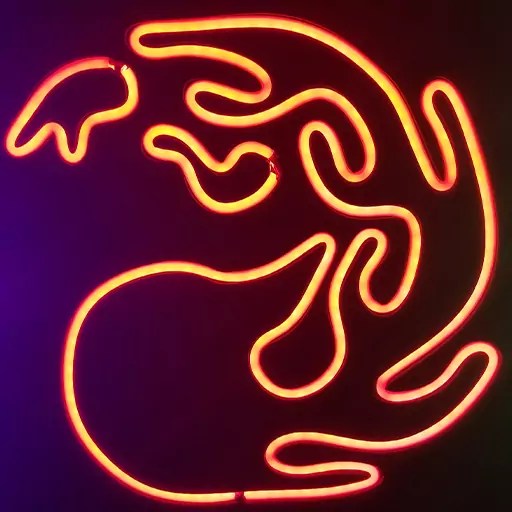
| MTG Mountain 3D Printed Neon Sign Download | Est. Print Time | Filament |
|---|---|---|
| Download for Bambu Lab Printers | 3-4 hours | PETG |
| Download for All Other Printers | ??? | PETG |
Forest MTG Neon Sign Shell
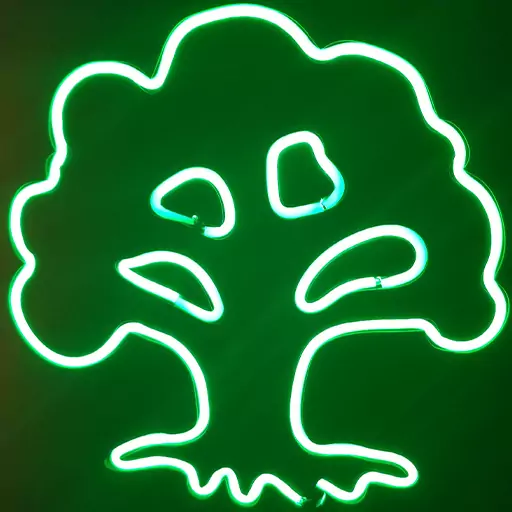
| MTG Forest 3D Print Neon Sign Download | Est. Print Time | Filament |
|---|---|---|
| Download for Bambu Lab Printers | 3-4 hours | PETG |
| Download for All Other Printers | ??? | PETG |
Final Thoughts
Thanks for sticking to the end. I really hope you have enjoyed this 3D printed light project and found it useful. With just a little bit of time in Fusion 360 and some basic solder skills, you can have your own custom 3D printed neon sign in no time!
If you end up making your own 3D printed neon sign, PLEASE share photos of them with me on Printables, MakerWorld, or even Twitter! I love seeing other folk’s creations! Also, consider sharing your 3D models for others to download as well. Thank you so much for reading through this 3D printed light DIY guide. I hope your build turns out great and you are as happy with yours as I am with mine! Happy building.
You May Also Enjoy

