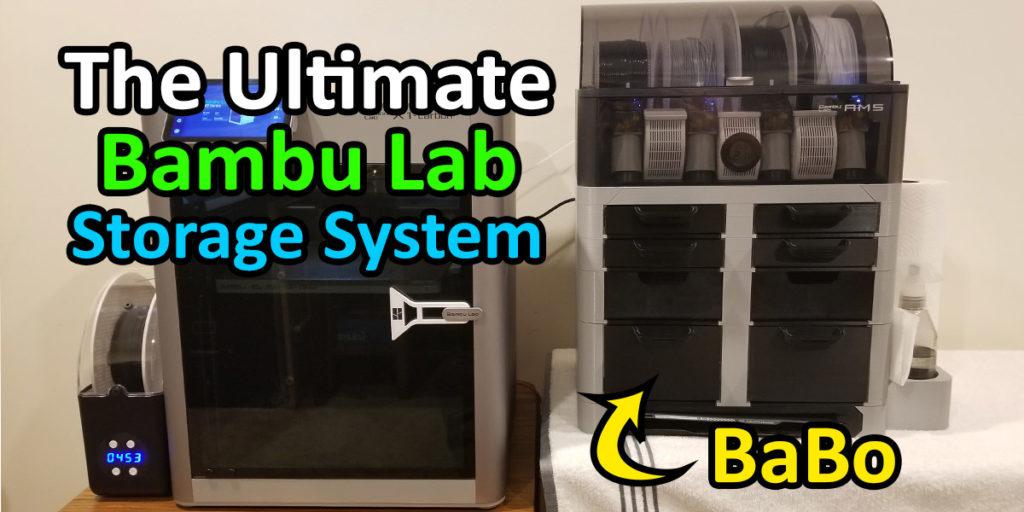
If you’re looking for the ultimate Bambu Lab storage box system, then look no further. With the BaBo system, you can organize all of your tools, hardware and spare parts in one convenient location. BaBo, an abbreviation that stands for Bambu Box, is an all-in-one Bambu Lab organization system designed to not only be extremely functional, but very sleek and stylish as well!
The BaBo system is a completely 3D printed Bambu Lab storage box solution that is directly inspired by the X1 Carbon’s design. It is completely customizable by having individual units, called ‘moduls’, that you can piece together to your needs and specifications. Within the moduls, you add inserts that are designated for specific parts or tools. See what moduls and inserts I decided on as I outline my entire BaBo Bambu Lab Organization system!
Table of Contents
This post contains affiliate links, which means I may receive a small commission, at zero cost to you, if you make a purchase through a link.
A Stylish & Functional Bambu Lab Storage Box for Organization
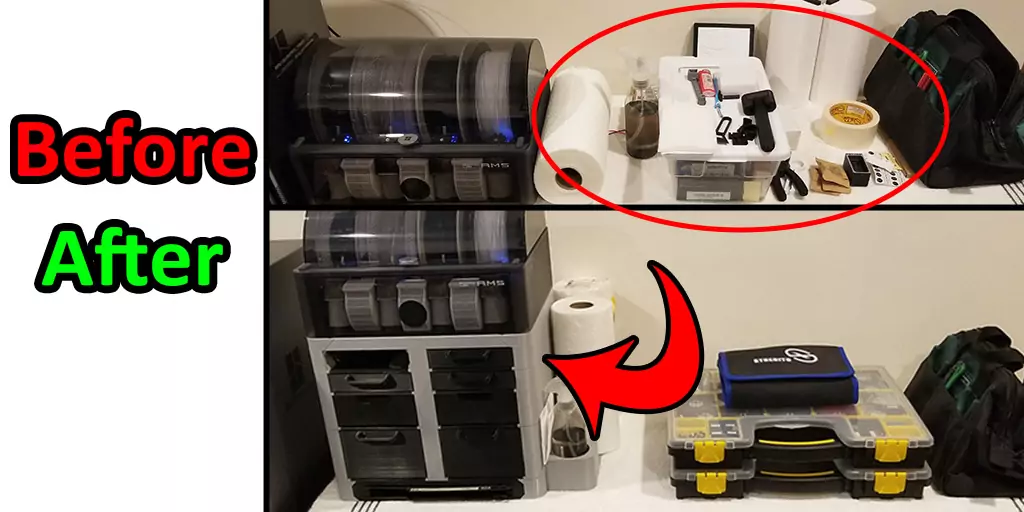
As mentioned previously, the BaBo system will help you organize your 3D printing space by removing all the clutter and give all of your spare parts and tools a dedicated home. This system was designed by user Willi and has taken heavy inspiration from the Bambu Lab X1 Carbon’s look and feel. You can view the entire collection of moduls and inserts at the BaBu Collection on Printables.
The best part about this amazing Bambu Lab storage box solution is that a lot of the models are completely free to download. There are a few modul and insert models that are only for Willi’s club members, a paid membership. And while I personally think it is absolutely worth it to join his club, you can certainly still build an entirely functional system with the non-club models only.
Just please keep in mind that designing and creating models like this costs designers both time and money. For example, think of all of the filament used during prototyping and testing. Show your love by supporting model creators if you’re financially able to do so!
Now then, speaking of models, if you’re at all familiar with Gridfinity then you are aware of the beauty and benefit of having dedicated homes for all your stuff. This is no different with the BaBo system and its part-specific-inserts. But we’ll go more in-depth on those inserts a little bit later. To start, there are two different BaBo systems you can build, the original BaBo System and the BaBo Duo System.
The Original BaBo System
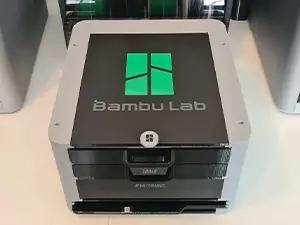
The original BaBo system is a stand-alone Bambu Lab organization system. It features singular drawers and doors that you build up using the different moduls. Each modul has a grid comprised of 8×7 units, with each unit measuring 30mm x 30mm.
All the inserts, both for the original BaBo and the BaBo Duo, are defined by this grid. For example, the Nozzle Insert is sized at 2×2. That means it is 60mm wide and 60mm long.
While I did not print this specific version, it was what initially caught my eye and drew me into this project. I loved the sleek design and the organization that this provided. Once I started investigating, I found what I feel is the perfect Bambu Lab organization system that fits my needs perfectly. That is the BaBo Duo System.
The BaBo Duo System
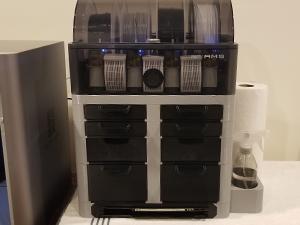
The second version is the BaBo Duo. This version is meant as a companion to Bambu Lab’s AMS unit. This version features double drawers and doors and is also just as modular as the original. Like the original, it features the same exact grid system, though it is only an 8×4 grid in each drawer.
This version of the BaBo can be configured a few different ways. The first, as shown in the photo, is to just sit the AMS on top of it using the AMS Adapter Modul.
The next configuration is to print out a Riser Stand Modul. This allows you to sit the BaBo Duo on top of the printer and place the AMS on top of the Duo. The last configuration is to just have the BaBo Duo as a standalone unit. Though, if that is your plan, I’d recommend the original BaBo instead.
Building the Perfect Bambu Lab Organization System
Given the two different versions and my needs, I decided that the BaBo Duo system would be the best fit for me. I really liked the original BaBo system, but the ability to set my AMS on top of my Bambu Lab storage box is what really sold me on the Duo. It’s like it was meant to be! After deciding which model I was going to roll with, I started planning everything out.
To start with, I wanted this to be durable so I settled on PETG for my printing material and used my tuned PETG Settings for my X1C to print with. All that being said, here are the exact parts I used on my BaBo Duo. After the parts list will be an overview on each individual printed piece used for my BaBo Duo storage box.
BaBo Duo Parts List
I order 2 rolls of Bambu’s Grey PETG Basic and 4 rolls of Bambu’s Black PETG Basic. When it was all said and done, I ended up using roughly one and a half spools of the grey PETG and about three spools of black PETG.
Also, on a side note, this was my first time using Bambu’s grey PETG and it came out so good! Dead serious, the photos do not do it justice. It is now my go-to PETG filament when color does not matter.
- 2x Grey PETG Basic spools
- 3x Black PETG Basic spools
- 2x packs of M3 x 8mm Countersunk Screws (100 each / 200 screws total)
For the required screws, my build took more than 120. I sort of lost track at one point… but I had a handful left over. All things being equal, this is a very small parts list considering the scope and the sheer size of this project.
BaBo Duo Moduls – Main Compartments
After acquiring all my parts, all that was left to do was figure out what my system would look like and print it all out. Ultimately, I decided I wanted 2x 30mm drawer units, 1x 90mm drawer unit, 1x 60mm front door unit and 1x plate unit.
After deciding what I wanted, I started to print it all out. No lie, it took about 6 days of nearly 24/7 printing to get all the moduls printed out, including any drawers, doors, floor pieces, etc. That is not including all the inserts! Starting from the top and moving down, the first modul is the 30mm drawer unit.
BaBo Duo 30mm Drawer Modul
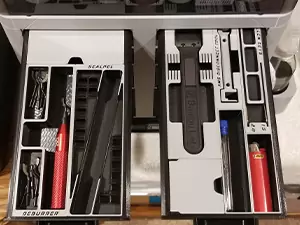
I wanted two sets of the 30mm drawer units. I planned for the two top-most-moduls in my Bambu Lab storage box to each be a 30mm drawer unit. The top one was planned to be tool storage mainly for finished prints.
The left drawer houses my most frequently used tools. Where as the right drawer was for tools that don’t get as much use. Both of these drawers are intended for inserts so items have a proper home and aren’t just cluttered.
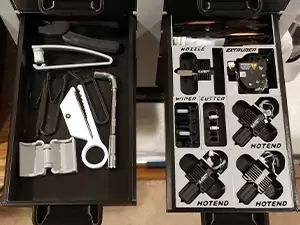
The second 30mm drawer unit is designated as my ‘printer box’. First, the left drawer on this unit is where I keep all my maintenance and cleaning tools for the printer. It is also sort of a catch-all for printer-related items.
In the right drawer sits all my spare parts such as hotends, nozzles, grease, etc. This was another drawer where I wanted to have inserts for each part.
BaBo Duo 60mm Front Door Modul
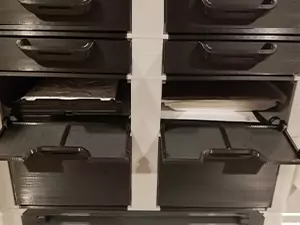
The next unit I included in my Bambu Lab storage box build was the 60mm Front Door Modul. If I were to start over or redo this, I would opt to not include this unit and instead just include a 60mm Drawer Modul.
Don’t get me wrong, the model is amazing. It just doesn’t work well with my setup. I believe the intended use of this unit is for if you’re not sitting your AMS on top of it.
Instead, using the Top Lid Modul as a means to primarily access its contents. Due to the width of the BaBo Duo, there is a bar in the middle for support, but that means each door is not very wide. My original plan was to stick my extra Cool Plate stickers in this unit.
Unfortunately, I can’t get those stickers in and out without bending them due to the middle bracing column. For now, I have stuck my Color Lithophane Picture Frame in there. I’m sure I will find more usages for it in due time though.
BaBo Duo 90mm Drawer Modul
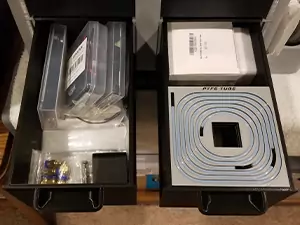
Following that is the 90mm Drawer Modul. The plan for these drawers was always for larger items and/or random one-off items. Items such as fans, batteries, low voltage power supplies, etc.
For the left drawer, I didn’t use any inserts. Just a free-for-all in there! Inside the right drawer are two 4×4 bin inserts. These two bins are a little different though.
The bin furthest back is printed at 90mm tall, the full height of the drawer. Where as the bin closest to the handle is only printed at 72mm tall. The reason for that is to accommodate 3x of the PTFE Inserts as makeshift lids for this bin. A bit more details on this can be found below in the PTFE Insert’s overview.
BaBo Duo Plate Modul
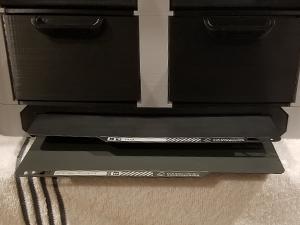
At the bottom of the entire organization box is the BaBo Duo Plate Modul. As the name suggests, this modul is for holding extra build plates. This modul can hold 3 build plates and is spring loaded!
On the inside and back are some cleverly designed 3D printed springs that makes popping a plate out a breeze. Just push the plate and remove your finger so it springs forward.
BaBo Spray Bottle & Paper Towel Modul
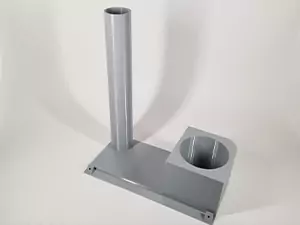
The last modul/unit I wanted to talk about is this BaBo Spray Bottle & Paper Towel Modul. I actually designed this specifically for my complete Bambu Lab storage solution. It attaches to the bottom-most-modul like every other modul get attached.
It sits right up against the assembled BaBo unit, flush. As the name implies, this modul has a tube to stick a roll of paper towels on and a cup holder for a spray bottle filled with Isopropyl Alcohol.
There are 4 different versions of this model. Two models that have a cup size of 80mm and two models that have a cup size of 65mm. Each of those also has a left-sided/right-sided model. The model I am personally using is the right-sided 65mm version. The spray bottle I use is a 12oz one that is roughly 58mm wide that I had laying around. If you’re looking for a compatible spray bottle, this 16.9oz Spray Bottle fits the left-sided/right-sided 80mm versions.
BaBo Inserts
Now that the BaBo’s moduls have been covered, it is time to investigate some of the part-specific inserts I ended up using. These inserts are what really make this an actual Bambu Lab organization system as opposed to just a plain ole storage box.
There are many, many inserts I have chosen not to use. Either because I don’t have the tool/part whatever said insert was designed for, or because I just didn’t want it. So take a look at the full collection to find some inserts that may be useful to you!
Nozzle Insert
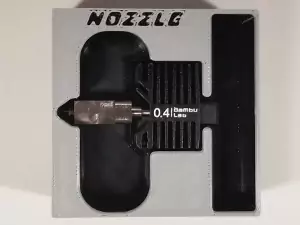
The first insert to go over is the Nozzle Insert. This insert occupies a space of 2×2 in the grid. Each one can hold a nozzle and a few spare parts such as screws or a tube of grease.
I only needed one of these as I only have the single spare 0.4mm nozzle that came with my Bambu Lab X1 Carbon. The nice thing about the nozzles are that they have their size printed directly on them. Therefore you can hotswap nozzles between inserts.
Hotend Insert
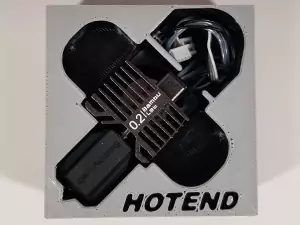
Similar to the Nozzle Insert, the Hotend Insert is able to hold one complete hotend per unit. I am not actually using Willi’s Hotend Insert model. His is a 2×3 insert that has quite a lot of spare room in it.
Instead, I am using a remix/redo created by BladeZee. The Hotend Insert from BladeZee is smaller and only takes up a 2×2 amount of space, freeing up an extra grid space! You do lose the extra room, but for me, this was perfect.
Extruder Insert
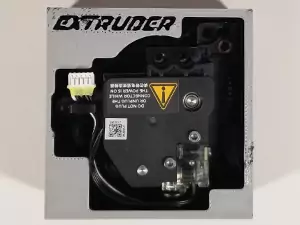
Same story for the Extruder Insert as above. Willi’s Extruder Insert fills a 2×3 space in the grid with a lot of extra room for screws and whatnot. Once again, BladeZee’s Extruder Insert is a really nice compact version.
Whether you use Willi’s or BladeZee’s, both have cutouts for removing the gears from the extruder on the back. This insert is pulling double duty! Here is a quick video from Bambu Lab demonstrating why an extruder gear removal tool is needed, if you’re curious.
PTFE Tube Insert
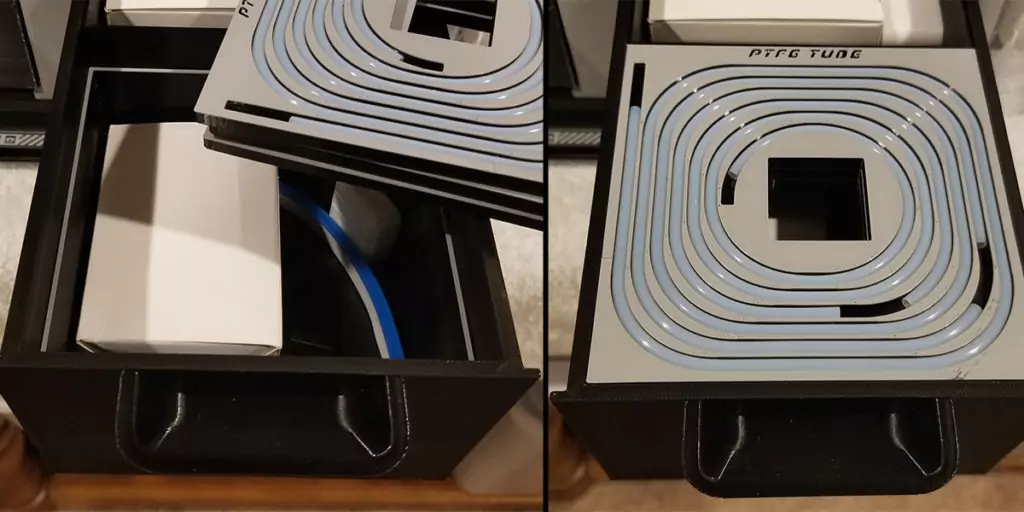
Like I mentioned above, I wanted to use the PTFE Tube Inserts as lids to one of my 4×4 90mm box inserts. Each PTFE Tube Insert is exactly 6mm tall. That means, in a 30mm drawer, you can stack 5 of these inserts on top of each other. I ended up only needing 3 of these inserts.
So, I took their total height, 18mm, and subtracted that from 90mm to get 72mm. This was the value I needed to scale my box to get the correct height. With the box and the 3 PTFE Tube inserts, I was right at that 90mm. As shown in the photo, those 3 PTFE Tube Inserts worked perfectly stacked on top of each other as a lid to that 72mm box!
Wiper & Cutter Inserts
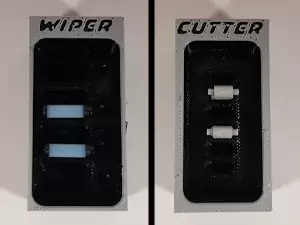
With these two inserts, you can store all of your spare wipers and filament cutters. The Wiper Insert and Cutter Insert, respectively, are both 1×2 sized inserts.
These are great for filling in areas in your grid where there may be gaps. By pure luck, I was able to get both of these inserts in the same drawer as my spare hotends, nozzle and extruder.
Slotted Box Insert
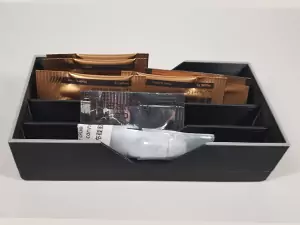
The next insert is sort of a catch-all kind of insert. It is a Slotted Box Insert with divided compartments within the box. I have chose to put all my grease and lubricant in mine. You can obviously use this for whatever purpose you see fit.
There are many different sizes available for this insert. The one I ended up using in my grid was the 4×2 sized-version. Just like the Wiper and Cutter Inserts, I was able to keep this one with all of my other spare parts!
Deburring Tool Insert
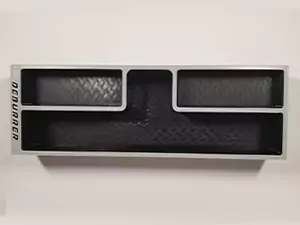
Having an insert for my deburring tool was a must. It is probably my most used tool when it comes to quick print cleanup. My deburring tool is a thicc boi so I had to use Willi’s Deburring Tool Insert. There are some extra spaces for the spare deburring tips too, which is great.
If you have a thin deburring tool, you may want to check out the Deburring Tool + Salpel Insert by _conny_k_ as it combines both of these tools into one insert. The combined insert has a smaller footprint as well, coming in at 6×3 as opposed to the separate ones coming in at 6×2 each (totaling 6×4).
Scalpel/Precision Cutting Knife Insert
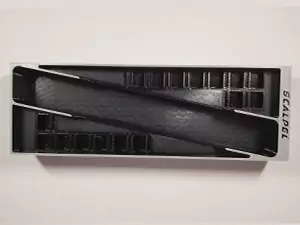
Since I needed to use the regular Deburring Tool Insert, that meant I also needed to use the regular Scalpel Insert by Willi as well. There is room for a couple of X-Acto Knifes and many blades in this insert.
As mentioned above, you can also try your luck with the combined Deburring Tool + Salpel Insert by _conny_k_. The regular version sits in a 6×2 space on the grid with the combined insert using a 6×3 space.
Razor Scraper Insert
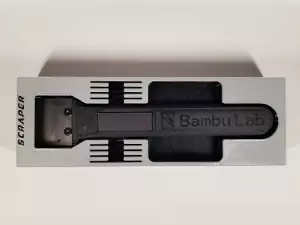
I really debated if I wanted to print this Razor Scraper Insert. I tend to not use this particular scraper because of how sharp it is. I have scratch some build plates with this tool, even when making a conscience effort of being careful.
Shameless plug incoming… I use my own Remixed Scraper of the pre-installed one on Bambu printers that hangs on my door’s handle when not in use. Anyway, I had the space for this insert, so why not? This insert occupies a 6×2 space on the grid and has slots for some extra blades in it.
AMS Disconnect Tool Insert
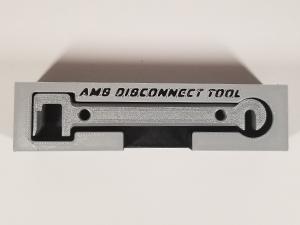
First off, if you haven’t printed yourself an AMS Disconnect Tool yet, you are doing yourself a disservice. Head over to the Best Bambu Lab X1C Upgrades page and print this out immediately! Anyway, this is an AMS Disconnect Tool Insert.
There are a couple versions of this insert. I opted for just the basic insert with the space for the AMS Disconnect Tool. This insert sits on a 4×1 space on the grid.
Allen Key Insert
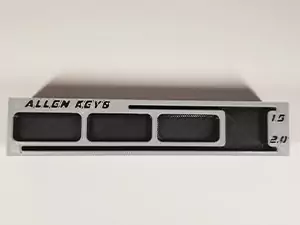
I really didn’t think I’d want or need this insert. But as I started putting everything together and placing all my parts and tools into their homes, it dawned on me. I had nowhere to keep the Allen keys that came with my printer.
I could put them in one of my catch-all-drawer, but that kind of defeats the purpose of this Bambu Lab storage box. That is where this dedicated Allen Key Insert comes into play. Now my keys have a permanent home and I don’t have to fumble through a drawer to find them.
Box Insert
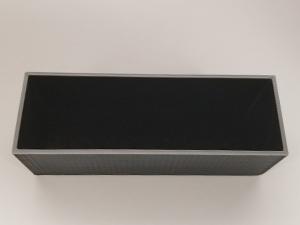
There is really not much to say about this. It is a simple Box Insert. There are many, many different sizes you can print of this. You can even customize your own, as mentioned in the PTFE Tube Insert section.
I used these to make inserts for items that don’t have a proper insert created (yet). A couple of good examples are inserts for my lighter and my nozzle cleaning needles. They are also great for filling space if your grid has some gaps in it!
Box with a Lid Insert
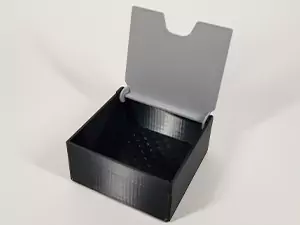
In a similar vein to the Box Insert, this is a just a Box Insert with a Lid. It also has many different size options to print out. I ended up printing a total of two of these inserts.
The first one I printed out was a 2×2 version. I use this to hold all of my hotend screws and other hardware specific for Bambu printer parts. The other one I printed was a 2×4 version. After everything was all said and done, I had a blank 2×4 section of my grid and used this as filler to complete the grid.
Bonus: BaBo Box + Gridfinity?
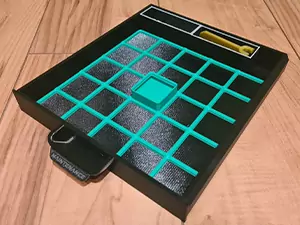
Already heavily invested in the Gridfinity echosystem? Well I have good news for you then. The original BaBo system has a nifty Gridfinity Insert that will transform your Drawer Moduls into a 5×5 Gridfinity base!
Full disclosure, I have not printed this and really haven’t dived into Gridfinity all that much. I know, I know. It is on my list to play around with at some point… Regardless, if this is your jam, BaBo has got you covered with this really cool insert!
This opens up a whole new level of inserts you can include in your Bambu Lab storage box. Unfortunately, there isn’t a Gridfinity adapter for the BaBo Duo. I think the Duo drawer’s width is the limiting factor. I don’t think a Gridfinity adapter at 3 units wide would fit. One at 2 units wide would leave far too much empty space. But for the original BaBo, this is a very viable option!
Is This Bambu Lab Tool Box Worth It?
So at this point, you may be wondering, is this Bambu Lab tool box worth it? I’m of the opinion that the BaBo box is 100% worth it. Below you can see my full pros/cons list, but the pros far outweigh the cons. And truth be told, the cons are not really cons, per se. Every single model is incredibly well designed and prints great.
You’ve got to understand, something of this size will take a long time to print, require quite a bit of filament and needs a fair amount of hardware for assembly. So with all of that being said, if you’re looking for a way to organize your 3D printing space, you cannot go wrong with the BaBo organization system. I know for me, it really helped get rid of the clutter and utilize my space much more efficiently!
Pros/Cons of this Bambu Lab Organization System
| Pros | Cons |
|---|---|
| Highly functional | Uses a lot of filament (4+ spools for my build) |
| Beautifully designed | Needs 100+ screws |
| Makes use of vertical space to get rid of clutter and free up your workspace by stacking moduls on top of one another | Limited number of inserts – not everything you own will have a dedicated insert |
| Modular – can be built to your specific needs and requirements | Due to its size, it takes a LOOOONG time to print everything out |
| Inserts such as the boxes can be scaled for either the 30mm, 60mm or 90mm moduls to make them perfectly fitting | |
| Very easy to print & assemble – no supports for printing and you only need to attach the screws for assembling |
Overall Rating: ⭐⭐⭐⭐⭐/5
Final Thoughts
That is my take on a great Bambu Lab organization system. Remember, I really only scratched the surface with my personal build. Be sure to check out the Full BaBo Collection to see everything offered! The flexibility and overall utility the BaBo provides makes this such an awesome and worthwhile project for upgrading to your 3D printing space.
If you keep your AMS on the side of your printer and build the BaBo Duo like I do, this is essentially free space from a two dimensional footprint standpoint. Even if you end up building the original BaBo system, you will greatly organize all of your 3D printing parts and tools. I truly hope you enjoyed this overview. Let me know if you have any questions in the comments below.
Fell free to stay connected with me on Twitter. Also, be sure to check out my models that I upload to the community on Printables and MakerWorld! I am regularly uploading new things that I want to share with the world, so be sure to periodically check’em out from time to time. Thanks for making it to the end. Happy organizing!
You May Also Enjoy




Leave a Reply