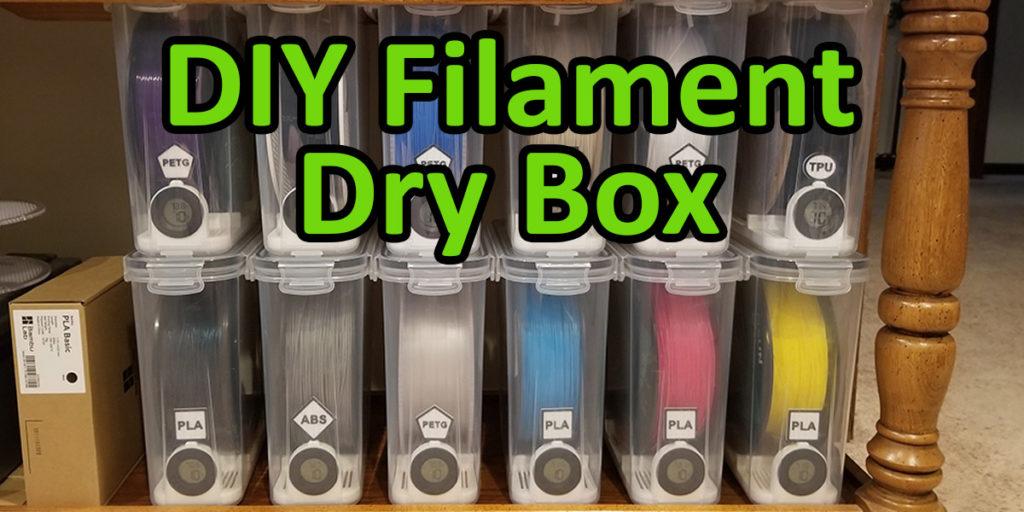
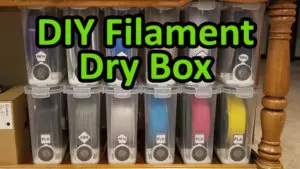
A DYI filament dry box is an effective way to keep your filament spools fresh, dry and protected. One of the most common banes in 3D printing is having wet filament. Wet filament not only causes filament to become brittle and prone to snapping, but also leads to awful printing issues. If you’ve ever experienced intense stringing, bubbling and uneven surfaces, nozzle clogging, or even bed adhesion issues, it could be due to wet filament.
That is why a filament storage dry box is the recommended way to store your filament when not in use. Follow along as we aim to solve this problem once and for all by building our own DIY filament dry box. With a few off-the-rack items and a couple of nifty 3D printed parts, you will have yourself a high quality dry box for all of your spools of filament!
Table of Contents
This post contains affiliate links, which means I may receive a small commission, at zero cost to you, if you make a purchase through a link.
DIY Filament Dry Box Container
In order to build a DIY filament storage dry box, you will first need a container that is air tight and that can hold a regular 1kg spool of filament. Luckily, some manufacturers have plastic cereal containers that are perfect for our needs.
I am like 99% sure that these Skroam Cereal Containers were secretly made specifically for 3D printing hobbyists and NOT for cereal, like they claim 😉. A spool of filament fits PERFECTLY inside of these containers, and are the foundation for this little DIY project. They tick all the boxes for our specific needs:
✅ Affordable & air tight
✅ Holds a 1kg spool of filament
✅ Comes with a free measuring cup!
Now that you have identified the containers you are going to use, you will have to decide how many individual filament drying box units you will need. For my usages, I decided that 12 individual filament storage dry boxes was good to start with. That number allowed me to put every open spool I have inside of one, rather than being left out in the open and exposed.
Parts List for the Filament Storage Dry Box
Here are the exact parts I used for this build. These were the cheapest versions available at the time and all worked out perfectly for my build.
Required Parts
- Cereal Containers – the 6-pack is slightly cheaper on a per item basis
- Silica Beads – for my 12 filament dry boxes, I used a little over half of the 2lbs container’s worth
- 20-Pack Hygrometers – there is also a 2-pack, 12-pack and 16-pack, but the 20-pack is cheaper on a per item basis
- PTFE Tube – I needed 2x of these for my 12 dry boxes
- Flush cutters
Optional Parts
If you want your DIY filament storage boxes to have a cap that the filament can feed out of, you will need these optional parts. For my build, I went with 6 capped filament dry boxes and the other 6 non-capped so I could stack the capped ones on top of them.
- 20-Pack PTFE Tube Connectors
- Extra Batteries for the Hygrometers – about half of my hygrometer’s batteries were dead on arrival, plus it is nice to have extras laying around
- Super Glue
Printing the Filament Dry Box Parts
You could just stick your filament spools inside the plastic cereal containers and sprinkle some silica beads on the bottom then call it a day. That was my initial plan at least. But I really hated the idea that there would be beads loosely scattered about on the bottom of the dry box.
So I started doing some research and stumbled upon an awesome 3D print that just so happened to be made for those awesome plastic cereal containers. User Modmike created a nifty silica bead holder which houses a hygrometer. This Filament Storage Dry Box allows for the spools to sit on top and spin freely. On a quick side note, if you find this project really useful, consider supporting Modmike by giving a small tip on their Thingiverse profile!
There is also an optional lid replacement for the cereal containers that has a cap which can allow filament to feed through. Essentially, this optional lid part replaces the preexisting lid from the cereal containers, which just snaps on and off. I opted for 6 of my filament dry boxes to have this lid component and 6 without. This allows me to stack the 6 lid versions on top of the other 6.
All the printed parts for this DIY filament dry box, minus one, can be printed in any material you’d like. I printed all of mine in white PLA, for example. However, the gasket for the optional lid needs to be printed in TPU.
The rubbery properties of TPU allow for the gasket to create an air tight seal, ensuring no moisture can enter you dry box. For what it is worth, I picked up a spool of this Overture 95A TPU and it worked really well. I just used the default generic TPU settings on my Bambu X1C and it printed great. After drying it out for a little over 8 hours, of course!
Printed Dry Box Parts
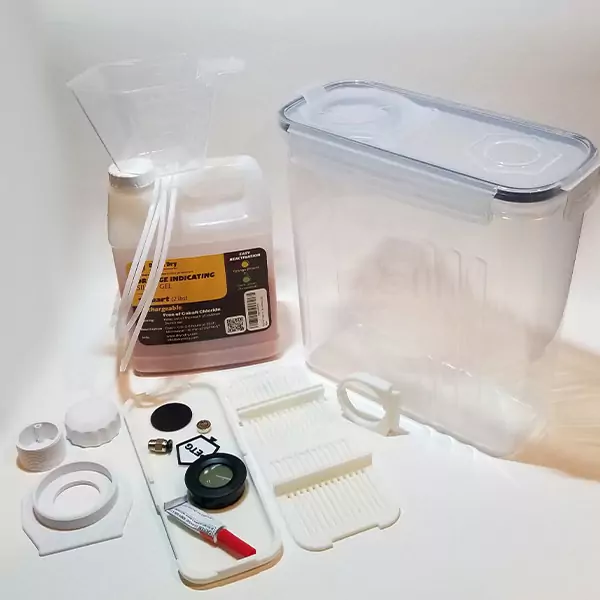
With all that being said, here are the parts needed for a single dry box. Print the optional parts as well if you’d like the lid component. In terms of the filament dry box hygrometer piece, you only need one. Depending on the version of hygrometer you receive, you will need either the vertical or offset frame.
You can tell which version you need by looking at the mounting tabs on the back of the hygrometer itself. Make sure the unit is right-side-up and then spin it around to see the orientation of the mounting tabs – that will tell you what version of the hygrometer frame you will need.
Required Parts – Filament Dry Box Base
- Tray.stl
- The base of the filament dry box where the silica beads sit
- Roller_cover.stl
- The base’s lid that keeps the silica beads sealed inside the filament dry box
- Hygrometer Frame – print the version you need
- Hygrometer_Frame_-_Offset.stl
- Hygrometer_Frame_-_Vertical.stl
- Reel Adapters – I didn’t print these out as I couldn’t figure out what they were for…
- Small_Reel_Adapter_front.stl
- Small_Reel_Adapter_rear.stl
- Tags
- Optional, but a nice touch to print out filament-specific tags so you can see what filament is inside each drying box without having to read the filament’s label
Optional Parts – Capped Lid Replacement
- Plug.stl
- This is the base that replaces the cereal container’s lid
- PTC_Fitting_Mount.stl
- This is the threaded fitting the cap screws on to and that the PTFE couple screws into
- Cap.stl
- The cap that screws on to the PTC_Fitting_Mount to keep everything air tight
- Gasket.stl – must be printed in TPU
- Sits inside the cap to give the entire lid replacement its air tight-ness
| Filament Dry Box Download | Creator | Filament |
|---|---|---|
| Bambu Lab Printers | Modmike | Any / PLA |
| All Other Printers | Modmike | Any / PLA |
DIY Filament Dry Box Build Instructions
The build instructions for our DIY filament drying box, starting with the base and then covering the optional lid assembly.
Base
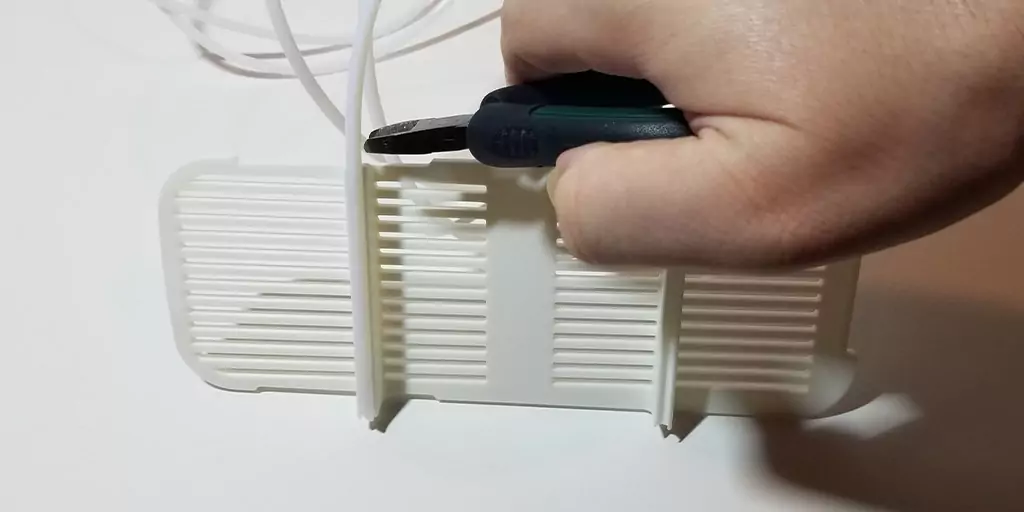
Once you have acquired all the needed parts and printed out all the pieces, we can begin assembling this nifty little dry box! Begin by taking the printed out Roller_cover.stl piece and fit your PTFE tubing inside the slots. Take a pair of flush cutters and snip the tubing to size. Do this for both slots. Set aside the Roller_cover.stl and grab the Tray.stl printed part. You will also need your container of silica beads and the measuring cup that came with your Skroam cereal containers.
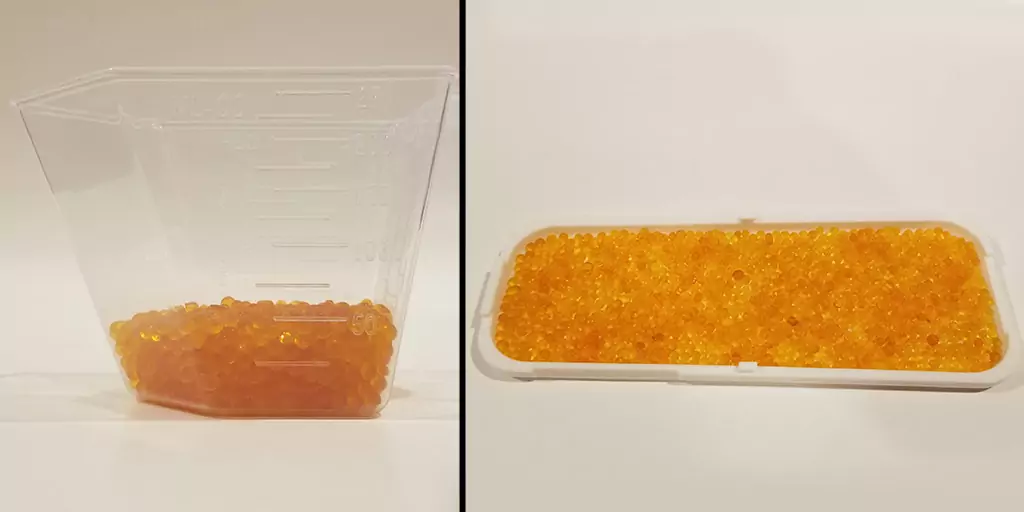
Dump about 50ml worth of silica beads into the provided measuring cup. Then pour that into the Tray.stl piece. Be very careful here, these silica beads like to runaway and travel what seems like 50 feet away if they accidentally spill out. Not like I would know anything about that though… 😉. Now fetch your Roller_cover.stl part and slide it onto the Tray.stl part. They will sit a bit offset from each other and then slide into place, almost clicking/snapping into the place.
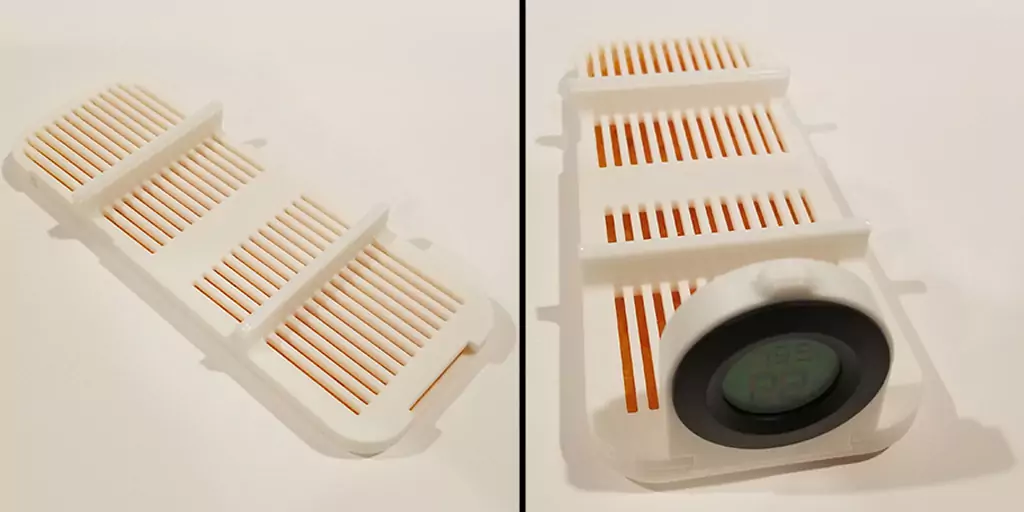
Once the Roller_cover.stl and Tray.stl are joined together, get your specific hygrometer part (Hygrometer_Frame_-_Vertical.stl or Hygrometer_Frame_-_Offset.stl). Snap one of your hygrometers into the frame and slide the frame into the slot as shown in the photo. Again, it will almost click or snap into place. You will know when it is secured.
If you’re having trouble with the hygrometer staying into the frame, carefully bend the mounting tabs on the back a bit. This should open them up and create a tighter fit. Just make sure you don’t accidentally break the plastic tab. Bend the tabs in small increments until you get the perfect fit. I had to do this on a few of my hygrometers.
That is pretty much all there is to creating the base of the DYI filament dry box. At this point, all that is left is attaching the filament tag to the back of the hygrometer frame. Then it is just a matter of slipping the entire base into the cereal container and putting your dried filament inside!
If you want the optional lid assembly, continue on, otherwise, consider yourself finished up! Just repeat this process for the rest of your cereal containers and build however many DIY filament dry box units you need.
Lid Component
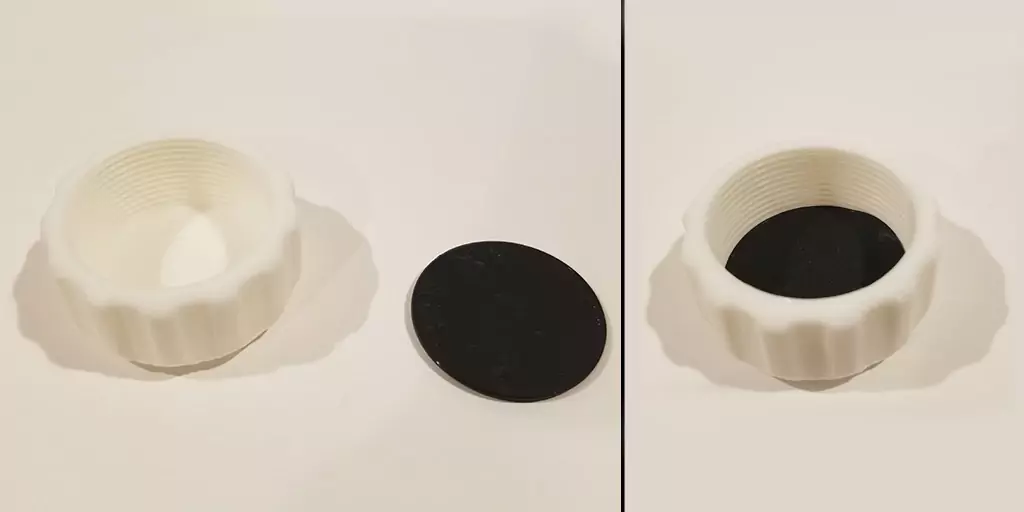
For the lid assembly, first get the Cap.stl part and the TPU Gasket.stl part. Stuff the Gasket.stl part inside the Cap.stl piece. It is going to be a really tight fit. That is by design as the gasket is to help keep air and moisture out of the entire drying box. I used a pair of needle nose pliers to get all the edges of the gasket flat to the surface of the cap‘s inside.
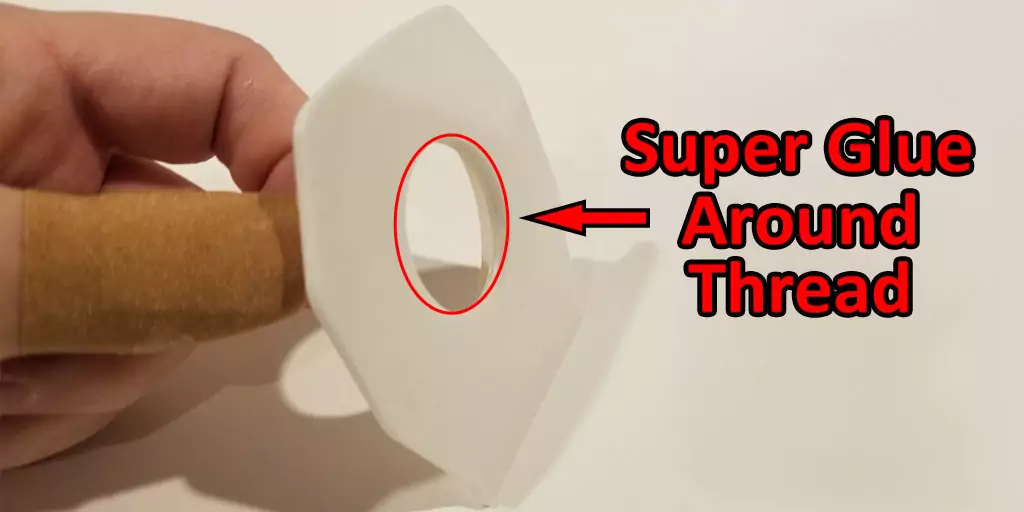
The next step is to attach the Plug.stl part and the PTC_Fitting_Mount.stl piece together. Using the photo above as a reference, apply some super glue around the Plug.stl part’s threaded opening. Then screw the PTC_Fitting_Mount.stl into it, tightening it until it is flush with the backside of the Plug.stl‘s surface. Let is sit for 10 or 15 minutes to semi-dry.
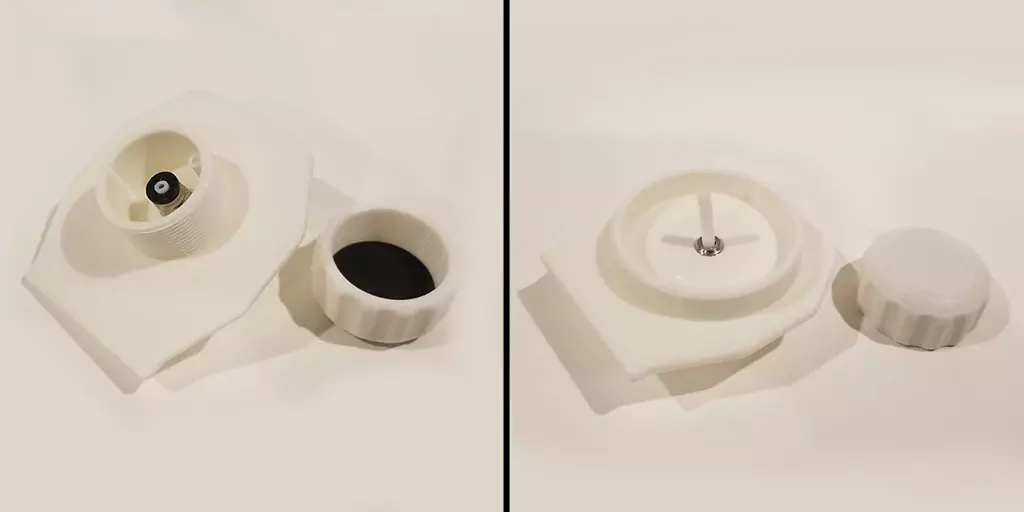
Once the Plug.stl part is somewhat dry, you can then insert the PTFE Tube Connector in the part. Reference the photo. You can also apply super glue here, but I don’t think it is needed. For me, the coupler was VERY tight fitting. In fact, I had to get a socket and ratchet it in, as I couldn’t do it with my fingers alone.
After the PTFE Tube Connector is attached, you will just want to cut a small length of PTFE tube and stick it inside the connector. The last step is to just twist the cap on to the component. I had to twist it on and off a few times to loosen it up a bit. You will probably have to do the same. Now, just rip the cereal container’s lid off and stick the assembled lid component in its place! And you’re done, congrats! You have yourself a really awesome and functional DIY filament dry box!
Final Thoughts on the DIY Filament Dry Box
That is a wrap. I hope you enjoyed this really neat DIY filament dry box project. Overall, I am very happy with this filament storage solution and am surprised at how easy it was to assemble in the end. I think it looks a bit more complicated than it really is. Anyway, be sure to checkout my work and keep up with me on Printables, MakerWorld, or Twitter! I hope you have enjoyed this and happy printing!
You May Also Enjoy

![DIY Filament Dry Box - The Top Filament Storage Solution 2 Skroam Cereal Containers Storage of 6 [4L/135.2 oz], Airtight Food Storage Containers with Lids, Plastic Cereal Dispensers for Kitchen & Pantry Organizers and Storage, Measuring Cup & 20 Labels](https://m.media-amazon.com/images/I/51bcuO4KtQL._SL500_.jpg)





Leave a Reply