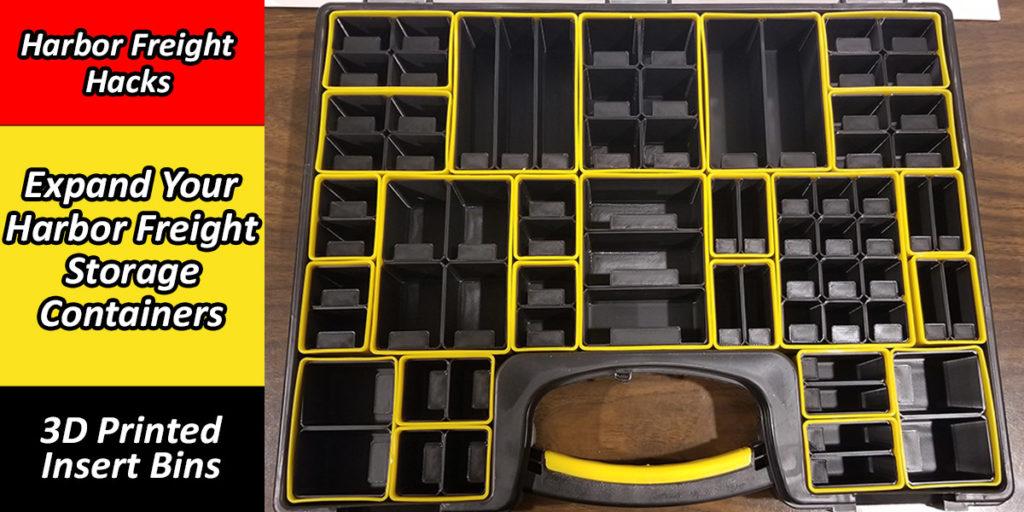
Harbor Freight storage containers are great. They are affordable and pretty decent quality. The only issue with them is that sometimes the parts bins are a bit too big and they do not sell replacement bins. But what if I told you there was an amazing Harbor Freight hack to get more space for your storage cases?
If you have access to a 3D printer, you can print your own inserts for your Harbor Freight parts bins. Give yourself even more compartments for storing even more parts! With these insert bins, you can expand the Harbor Freight storage containers from 20 compartments to 50+ compartments. Follow along as we go over one of the best Harbor Freight hacks and completely transform your parts bin storage cases!
Table of Contents
This post contains affiliate links, which means I may receive a small commission, at zero cost to you, if you make a purchase through a link.
Harbor Freight Storage Containers
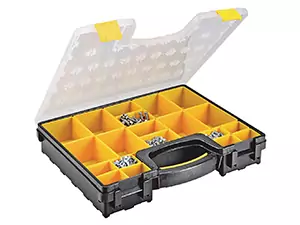
If you are not aware of the Harbor Freight Parts Bin Storage Cases, you need to listen up. These things are downright dirt cheap and really good quality, all things considered. Often times these storage containers go on sale and can be found for less than $8 each!
That is ridiculous value! All-in-all, you get the storage case itself and a whole slew of different sized parts bins. In total, you get 20 parts bins with 8 large boxes, 8 small boxes and 4 medium boxes.
These boxes are good for general purposes, but what if you want more of a particular sized box? Unfortunately, Harbor Freight doesn’t sell replacement or spare parts bins. And one of the most common complaints about these Harbor Freight parts bins is that the large box is too large. So, what is one supposed to do then?
If you want different sized bins, do you just buy another whole storage case? Well, you could. But that is a waste of money and a waste of plastic. That is where this fantastic Harbor Freight hack comes into play. Instead, you can 3D print smaller compartment insert bins for your large boxes to greatly expand its storage capabilities!
One of the Most Helpful Harbor Freight Hacks
There is a pretty dedicated community of folks who are into Harbor Freight hacks and DIY projects. Some of the most well known Harbor Freight hacks & projects are building a custom trailer, creating a go kart, and making a custom power bank from an ammo can. Another one of those awesome hacks is the subject of today’s topic: 3D printed inserts for Harbor Freight parts bins!
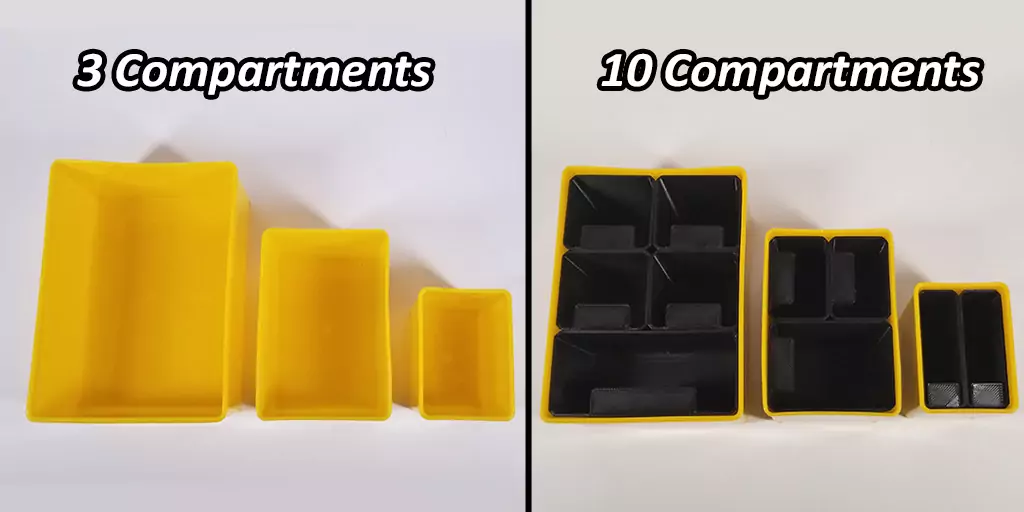
This specific Harbor Freight hack allows you to better utilize your storage containers. By making your own bin inserts, you will be able to fit more kinds of parts in a single case. Take for example, the above photo showing a single large, medium and small bin. On their own, they make only 3 compartments. But once you deck out your storage case with some bin inserts, you transform that into a total of 10 compartments!
Take a look at the Common 3D Printing Hardware & Fasteners page to see this awesome Harbor Freight hack in action! I have an entire storage case filled with all my 3D printing hardware that has these insert bins in it. This allows me to better utilize my space and cram more parts inside a single storage container.
Inserts for Harbor Freight Parts Bins
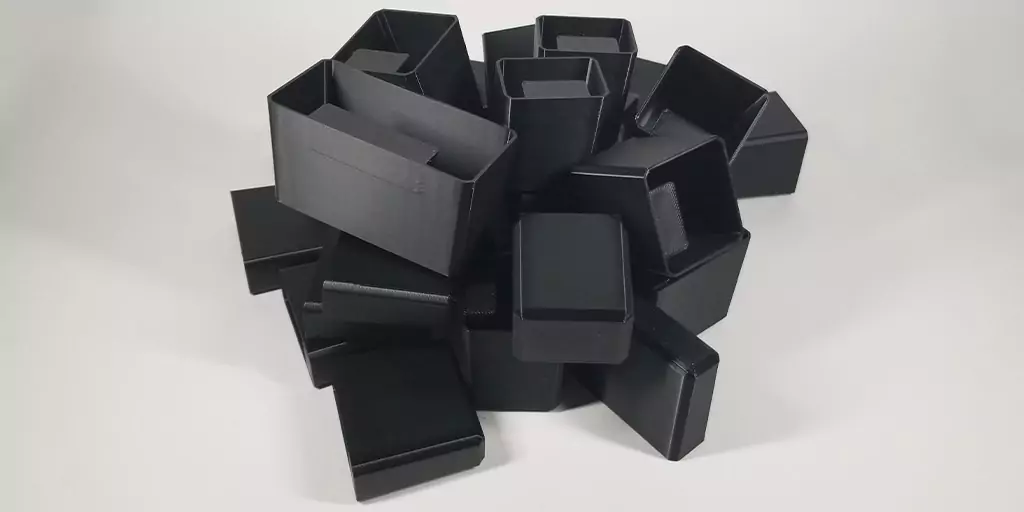
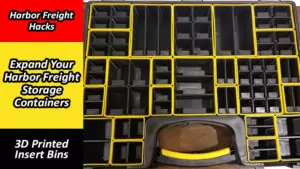
Using the empty Harbor Freight storage case from above as an example, I turned a measly 20 compartments into 74 different compartments for parts with the additional insert bins! The best part about these Harbor Freight storage containers with the insert bins is that they are flexible and modular. You are not locked into anything either. You can swap out bins and change their position whenever you feel like.
Need a bigger bin? No problem, just remove some of your inserts to decrease the number of compartments and increase the compartments’ size! Need more compartments? Sure thing, just add a bunch of smaller insert bins to break up the box size! There are 3 different box sizes, each with its own quirks.
Harbor Freight Parts Bins: Large Boxes
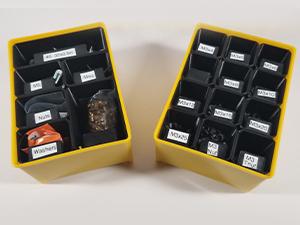
At first, I HATED these large boxes. Almost anything I tried to store in them was just swimming around freely. It was absolutely and completely overkill. There was so much left over, wasted space, it wasn’t even funny.
After printing a bunch of the Harbor Freight storage containers bin inserts, the large boxes have become my favorite box! In fact, I wish I could replace all my medium and small boxes with these large boxes.
The large boxes have the most flexibility, by far, when it comes to the 3D printed bin inserts. You can mix and match to your heart’s content. If you need to, you can have as many as 12 different compartments per single large box. It’s crazy, turning what was supposed to be just a single compartment into 12 separate compartments! Talk about efficiency.
Harbor Freight Storage Case: Medium Boxes
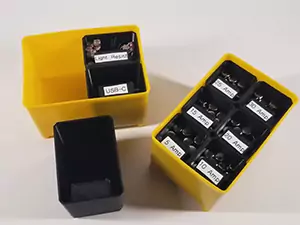
There isn’t a whole lot to say about the medium boxes. These are 50% of the size of the large boxes and any insert bin that occupies less than 50% space of the large boxes will fit these medium sized boxes.
While not nearly as versatile as the large boxes, the medium boxes still offer a lot of different configuration options. I find that these are very handy for utilizing small insert bins.
This allows you to create many compartments for smaller items or items you don’t have very much of. A great example of this is that I keep all of my fuses in one of these medium boxes, as shown in the photo. I only have a handful of each fuse and this allows me to fully utilize a medium box’s space!
Harbor Freight Storage Containers: Small Boxes
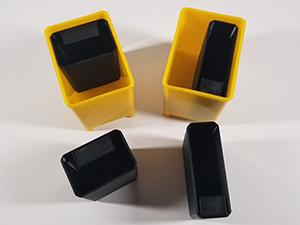
The small boxes used to be my favorite box in the Harbor Freight Parts Bins Case. They are small enough where parts actually filled them up to some degree. Even so, there was often times where these bins still had quite a lot of room leftover.
This made it hard to justify using an entire box. But what else can you do? Buy another storage case or 3D print your own bin inserts.
Unlike the medium and large boxes, these small boxes need their own dedicated insert bins. Basically, the boxes that should fit them need to be scaled down a little bit. The small box insert bins are scaled roughly 96% in the x-axis and y-axis to get a really good fit.
Due to how small these boxes are, only two insert bin designs work with them. Splitting these boxes by more than half doesn’t work out too well once you factor in the insert’s tab. Still, going from 8 compartments to 16 compartments is a pretty good ROI, so to speak.
Download the 3D Printed Harbor Freight Storage Case Insert Bins
If you’re interested in this awesome Harbor Freight hack then grab the free 3D models and start printing your own! I remixed and created all of the different sized insert bins by using spuder’s parametric bin insert file.
If you have a Bambu Lab 3D printer, there are pre-made print profiles you can use without any set up. For folks with other printers, here are the settings I used when printing my Harbor Freight storage containers insert bins:
- PLA material
- 0.4mm nozzle
- 0.28mm layer height
- 2 walls/perimeters
- 8% infill – gyroid
- No supports, no brims, no rafts
| Harbor Freight Storage Case Insert Bins – Large Boxes | By | Filament |
|---|---|---|
| Download for Bambu Lab Printers | TheMakerSphere | PLA, PLA+, etc. |
| Download for All Other Printers | TheMakerSphere | PLA, PLA+, etc. |
As mentioned above, you will need to download and print separate bins for the small boxes. Theoretically, the small boxes are 25% of the size of the large boxes. In actuality, they are a bit smaller – maybe 24% of the size. Regardless, that means the small insert bins meant for the large boxes above will NOT fit the small boxes. These insert bins will fit the small boxes:
| Harbor Freight Storage Containers Insert Bins – Small Boxes | By | Filament |
|---|---|---|
| Download for Bambu Lab Printers | TheMakerSphere | PLA, PLA+, etc. |
| Download for All Other Printers | TheMakerSphere | PLA, PLA+, etc. |
Bonus: 3D Printing a Harbor Freight Storage Case Rack
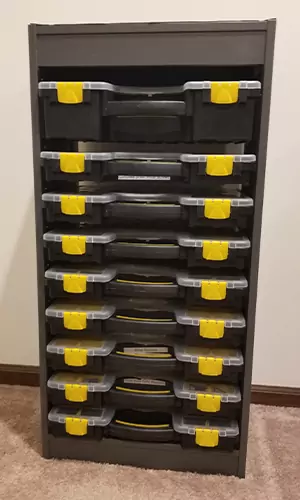
As a little bonus, I wanted to highlight a cool Ikea Hack you can utilize with your Harbor Freight storage containers. With some unique and clever 3D printed rack mounts and an Ikea Trofast cabinet, you can have a nice storage solution for all of your parts bins!
Long story made short, you basically build the Trofast shell. Then, when it comes to installing the included metal brackets, you instead install the 3D printed rack mounts using some self-tapping screws. This will allow you to then store your Harbor Freight parts bins for easy access!
One thing to be aware of, the spacing on the Trofast unit is not a perfect fit. As you can see in the photo, I found that having 8x rack mounts for the 20-Part Bins and 1x rack mount for an 8-Parts Bin was almost a perfect fit. Below you will find the 3D models for the parts bin rack mounts.
I did add one finishing touch before calling this little Ikea hack complete. I cut out a piece of non-slip liner and placed it on top of the unit. This is so I can place whatever bin I am currently using on top without scratching the top surface. Top surface is about 12 inches long by 18 inches wide, so that liner worked out perfectly for me, with a bunch to spare!
Parts Needed to Build:
- Ikea Trofast Unit
- #6 1/2 inch self-tapping screws
- The 3D printed rack mounts
- Non-slip Liner (optional)
| Harbor Freight Parts Bins Storage Rack | By | Filament |
|---|---|---|
| Download for Bambu Lab Printers | user_2694253617 | PLA, PETG, etc. |
| Download for All Other Printers | Boosted | PLA, PETG, etc. |
Final Thoughts
Thanks for sticking to the end! I hope you enjoyed this little Harbor Freight hack! I am a big fan of the Harbor Freight storage cases because they are incredibly useful, and more importantly, very affordable. My only complaint was not being able to better utilize the space within.
Well, that complaint is null and void with the use of these Harbor Freight storage containers insert bins! Now I can transform the standard 20 compartments into 50+ compartments, per case. Efficiency at its finest!
Let me know in the comments, what 3D printed Harbor Freight hacks and projects have you tried out? What hardware and parts do you keep in your storage cases? With all that being said, be sure to follow me on Printables, MakerWorld, and Twitter! Happy organizing!
You May Also Enjoy



Leave a Reply