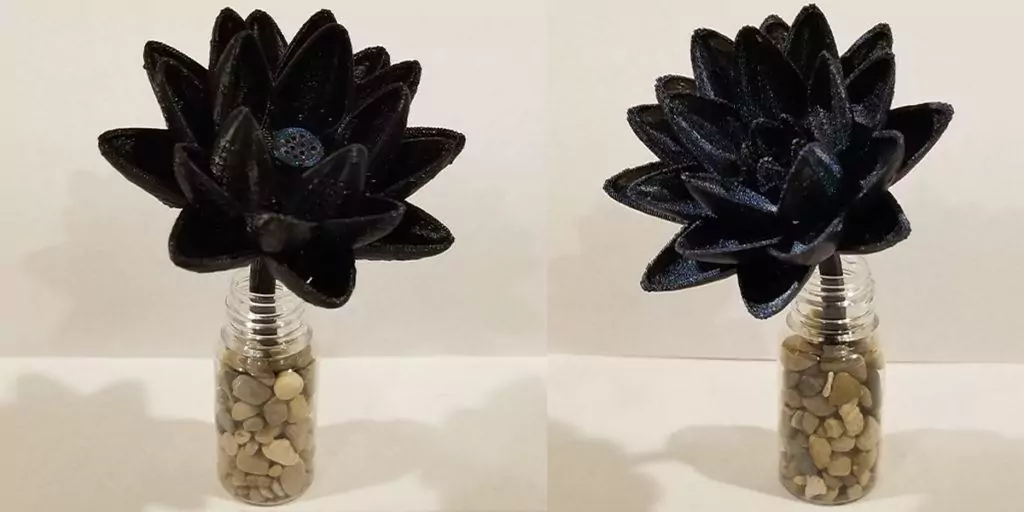
Create your very own MTG Black Lotus display piece with this free and easy DIY project. I’ve created a couple different 3D models that you can print out to have a unique and beautiful Black Lotus of your own.
With just a few 3D printed parts and a couple of common household items, you can have your own simplistic, yet beautiful Black Lotus to put on display. Display it on your desk, bookshelf, mantle or anywhere else. Once all the pieces are printed out, assembly should only take 25-30 minutes to complete. Let’s jump in with free 3D model downloads and step-by-step instructions.
Table of Contents
This post contains affiliate links, which means I may receive a small commission, at zero cost to you, if you make a purchase through a link.
MTG Black Lotus Downloads & Project Parts
- The Black Lotus flower (2 different models to choose from)
- Black Lotus with 5 petals in the middle
- Black Lotus with an empty middle to place a separate bud
- The Black Lotus flower bud
- Only needed if the Black Lotus flower 3D model you chose is the 2nd one
- A Black Lotus stem (2 different models to choose from)
- Long Black Lotus stem
- Short Black lotus stem
- Pebbles – I got a handful from my backyard
- Small clear glass or plastic bottle
Bambu Lab owners, I have pre-made print profiles for both of the different Black Lotus 3D models. See the MTG Black Lotus page on MakerWorld for the downloads for an easy print!MTG Black Lotus Tools & Supplies
There really are not many tools you will need. You may need a lighter to burn off any strings on your 3D printed parts. I had a few strings on my flower print, but a quick singe with the lighter took care of them easily. I also used a pair of needle nose pliers to help remove the supports off of the flower. Aside from that, all you need is some superglue.
MTG Black Lotus Step-by-Step Instructions
Print Settings
* For 3D printing, I use Cura as my slicer. All the settings and screenshots will be referencing Cura
Flower
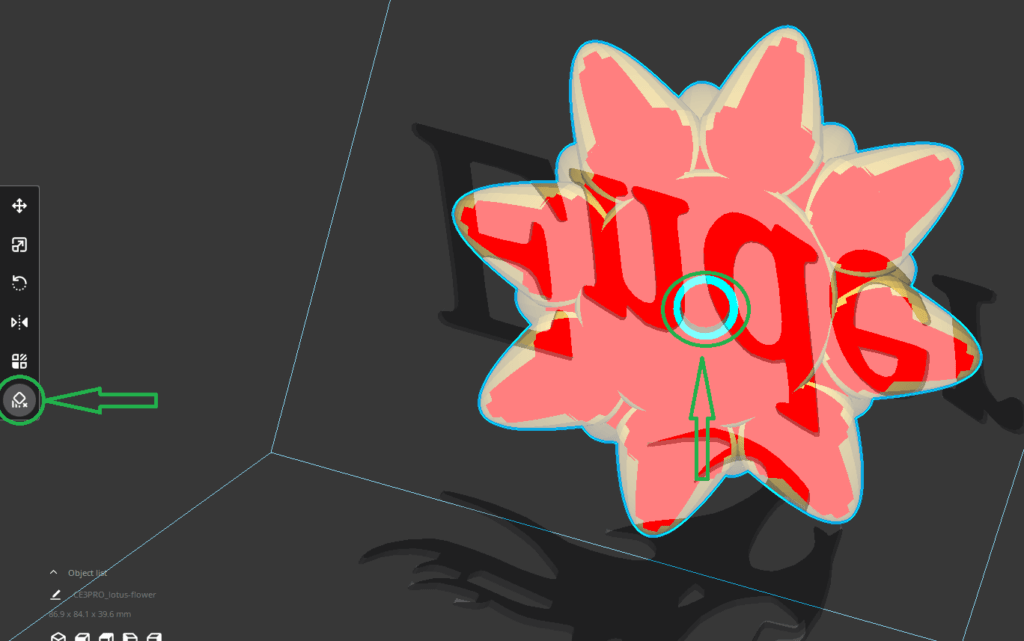
When you print your Black Lotus flower, make sure the petals are facing up. You will need to have supports for this print and make sure you block supports on the flower’s stem hole. In Cura, there is a support blocker feature. Click on the support blocker and click on the top of the hole where it is flat to disabled supports from being generated inside the stem hole. See the green circles and arrows.
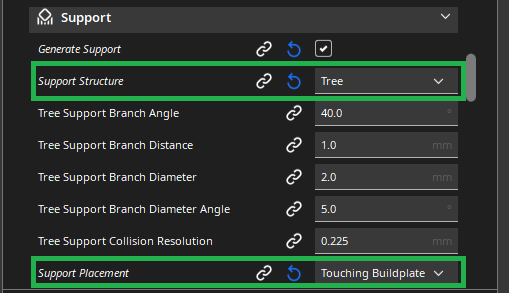
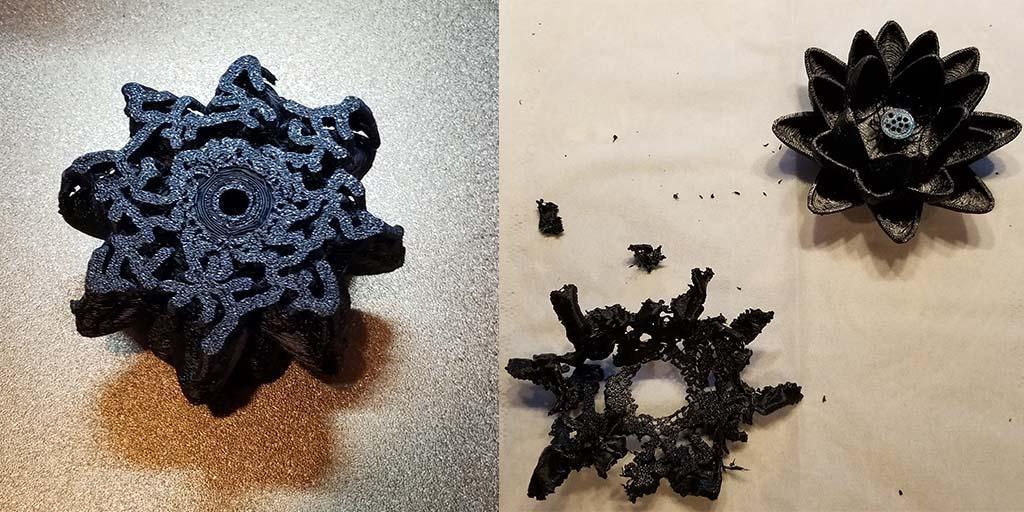
You will need to enable support generation. I ended up using Tree Supports as I found them much easier to remove than the traditional supports Cura generates. It is important that you enable supports only for parts touching the buildplate. Otherwise, you will have supports that generate within the petals. Trust me when I say, you will not be able to remove them without snapping off petals in the process. Ask me how I know?
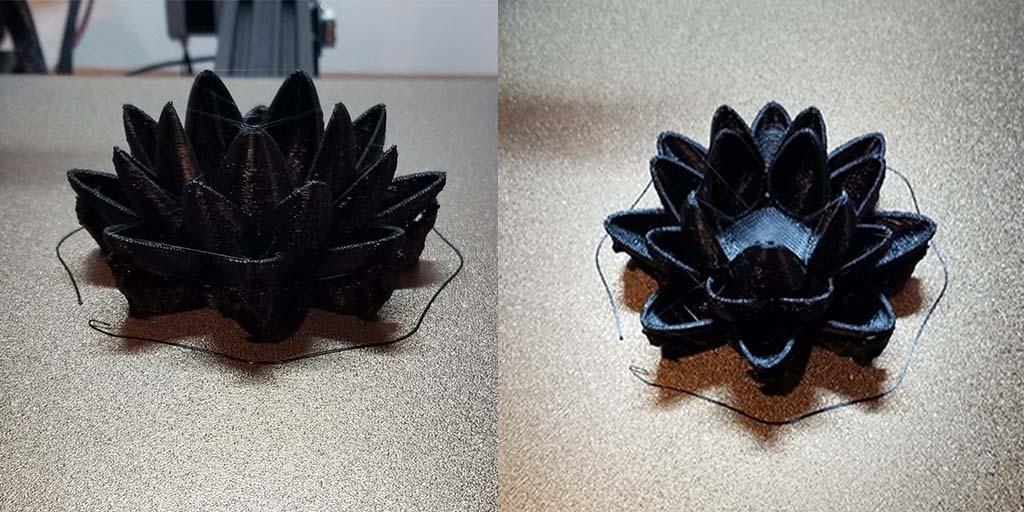
Once you have these settings configured, you can start your print. I did 15% infill, but there isn’t much infill to begin with. Print at whatever layer height you’d like. Here is one of mine after it has completed printing.
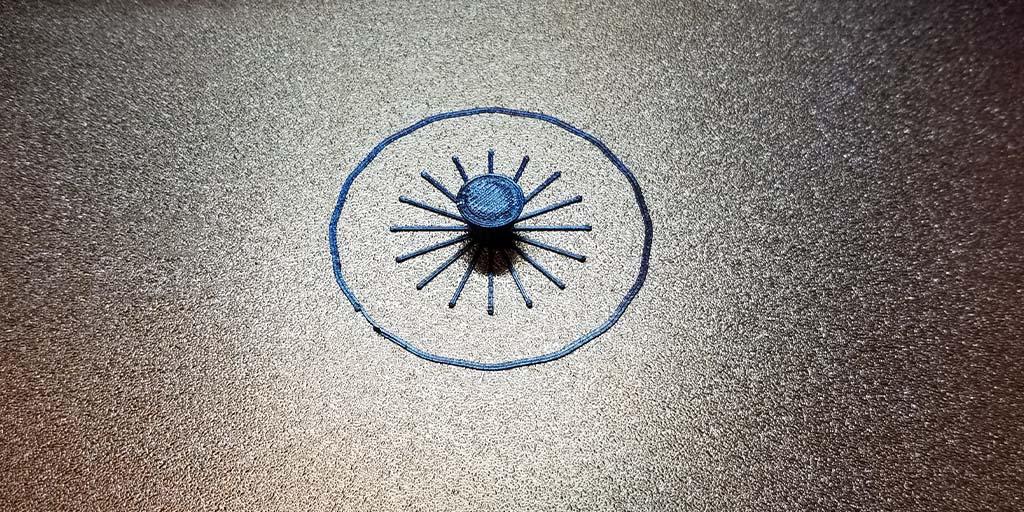
Flower Bud
If the flower model you chose is the version where a bud is to be placed, you will need to print a bud. This is a very quick print and requires nothing special. I used the printing profile I use for everything with no supports and within 20-30 minutes, the printed bud will be finished.
Flower Stem
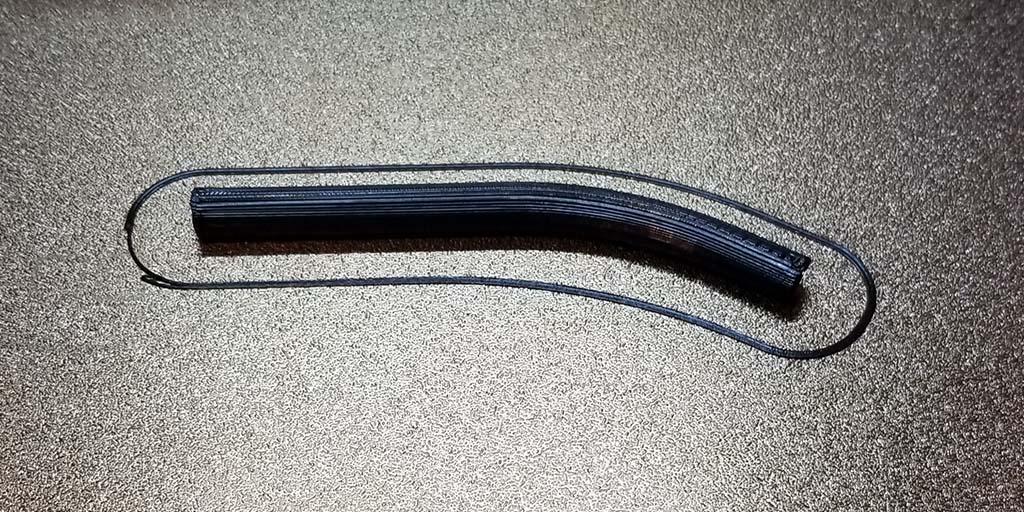
For the flower’s stem, this is really just a tube with a hockey stick-like curve at the top. Both the short version and long version have the same curve. The long version just has a longer straight section than the short version. For either one of these prints, I’d suggest laying them on their sides. If you print it laying on its side, you shouldn’t need any supports or brims or rafts. Here is one of mine after printing to demonstrate:
Prepping the 3D Models
Flower Bud
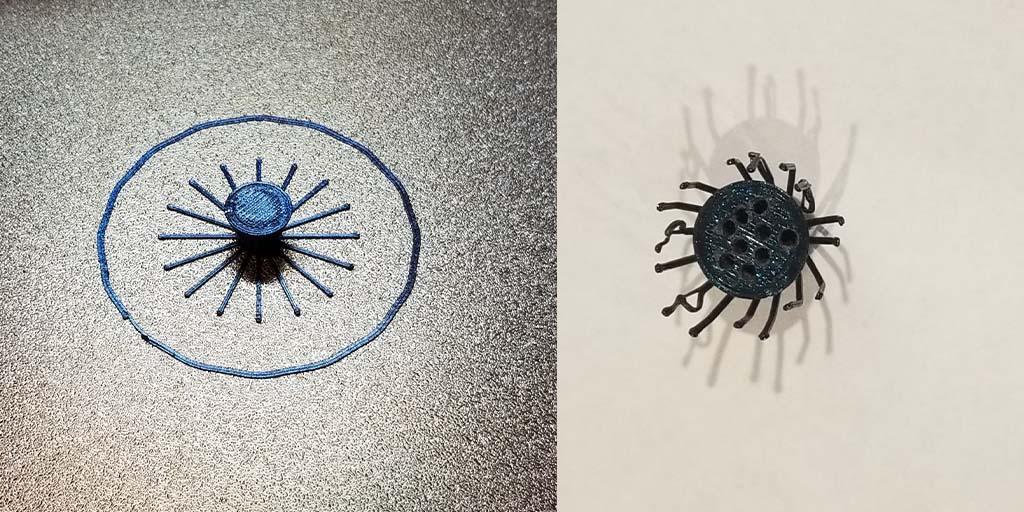
If you printed the Black Lotus with the empty middle section for a bud, you will need to do some minor prep to the bud. You basically want to fold and bend all the strands up and then over the top of the cylindrical cone. This will give the entire bud and uneven and stringy look, which is exactly what we are after. Optionally, you can drill some holes in the top of the bud to give it more details. I chose to do this and used a 1/16th drill bit to create the holes. Here is a before and after of my bud.
Flower
If you have the flower with the bud, you will want to superglue the bud to flower before removing the supports. This will give you a nice flat base on the flower so it is not rotating while you are applying pressure for the glue to dry.
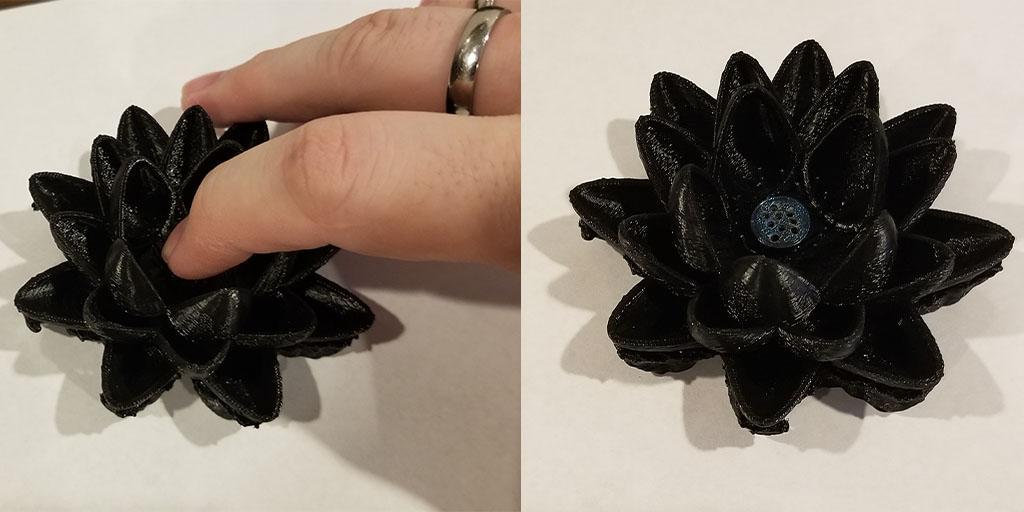
The biggest hurdle with this project is going to be removing the supports from the flower’s base. Use whatever tools you feel comfortable with, but I ended up using a pair of small needle nose pliers so I could grip and twist the supports off. I am right-handed, so I carefully held the flower in my left hand with my index finger and thumb gripping a petal. With my right hand, I began working the supports off with the needle nose pliers. Be sure not twist or pull with the hand holding the flower. Be gentle and the supports will come off. Afterwards, you can sand the bottom if you’d like.
Flower Stem
After you have removed the supports from the flower, go ahead and dry-fit the stem into the base of the flower. If it will not go in, you will need to lightly sand the top tip of the stem. It it is too loose, you will need to apply superglue so the stem holds the flower. I was able to pressure fit my stem into the flower without having the sand or glue it. I’ll probably go back and apply some superglue too, as that is what I’d recommend regardless.
Assembly
Finally, if you haven’t done so already, attach the stem to the flower’s base. All that remains is taking your glass or plastic bottle and filling it with pebbles. You want to make sure you have tiny pebbles that can fit in the bottles opening.
Stick the stem inside the bottle and begin to move the stem towards the bottom while wiggling the bottle. Eventually the stem will be all the way down. If your display piece is top-heavy, adjust the stem to stick up more vertical rather than leaning. The pebbles should hold the steam in place. With all that out of the way, you’re done!
You May Also Enjoy







Leave a Reply