One of the easiest ways to access your media and files over a network is to setup an SMB file share on Windows. With the proper setup, you can access your media files through other devices using the SMB protocol. Windows has SMB file sharing built into its operating system.
With a few quick configurations on Windows, you will be fully setup with SMB file share enabled so you can access your files or media from other devices on your network. First, ensure SMB is enabled on your Windows operating system. After confirming SMB is enabled, select the folders and files to share over the network. Follow this guide for step-by-step instructions to get SMB file share working on Windows.
Table of Contents
How to Enable SMB on Windows
By default, SMB should be enabled on Windows 10 and 11. The SMB feature on Windows is called SMB Direct and is Windows’ name for the SMB 3.x file sharing protocol. The first step is to ensure this feature is enabled. If for some reason it is disabled, follow these steps to enable it. If you don’t have the SMB Direct feature available, make sure your Windows operating system is fully up to date.
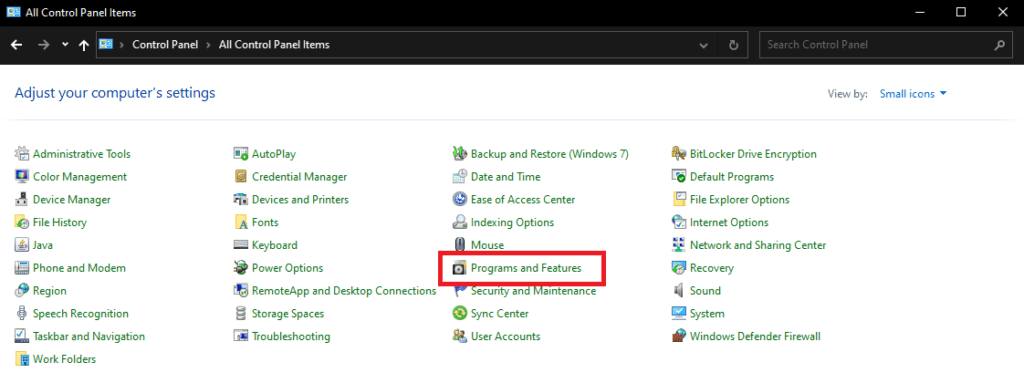
Launch the Control Panel and select the Programs and Features option.
Once you have clicked on Programs and Features, on the left menu bar, at the top, look for Turn Windows Features On or Off. Go ahead and click into that.

Clicking on Turn Windows Features On or Off will bring up a new small window with a list of checkboxes. These should be listed alphabetically. Scroll down and find SMB Direct. Make sure this box is checked. You may also see SMB 1.0/CIFS File Sharing Support.
If you do have this option, make sure it is unchecked. This is how you enable SMB 1.0, but SMB 1.0 has some vulnerabilities associated with it. If this feature is enabled, your machine and entire network could become compromised. I highly suggest turning this feature off, if enabled, and leaving it off, it disabled.
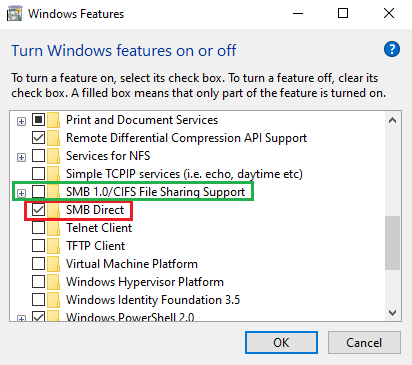
After turning SMB Direct on by checking the box, your Windows machine should be good to go and have SMB enabled. Now all we need to do is setup SMB file shares on Windows and assign the correct users to the shares.
Setup SMB File Share on Windows
Before beginning with setting up the SMB file share, I would strongly encourage you to create a new user on Windows specifically for sharing. It only takes about 30 seconds and provides a lot of extra security. You can choose to skip creating a new user, but then anyone who has access to your network will have access to the SMB file shares you create.
If you are not going to create a new user, you will need to go into Control Panel -> Network and Sharing -> Change Advanced Sharing Options -> All Networks ->then enable Turn Off Password Protected Sharing. Again, this is not ideal and exposes you to anyone who may have, or will have access to your network. Replace the word kodi in my screenshots with the word Everyone (that is a preexisting user you can select).
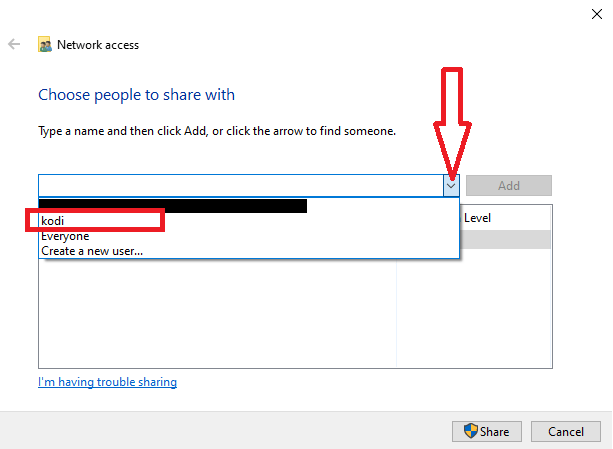
I am using a user I named kodi to setup SMB file shares. Use the user’s name that you created in place of kodi as seen in the provided screenshots.
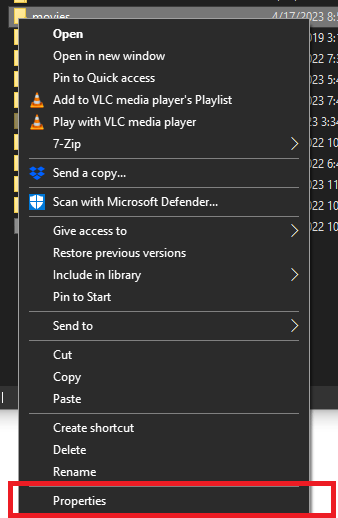
First navigate to the folder you wish to share. Go ahead and right click on the folder and select Properties at the bottom.
Once the folder’s Properties window is open, navigate to the Sharing tab.
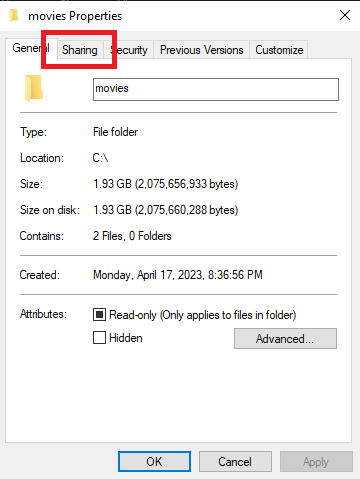
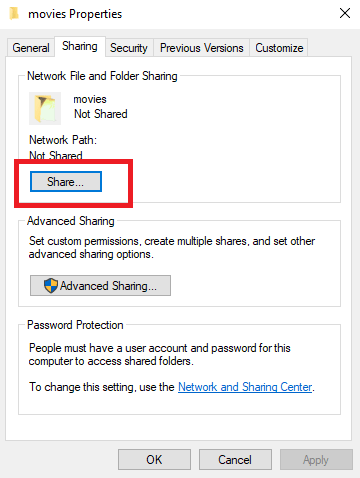
From there, go ahead and click the Share button to open another window.
Another window will open and you will want to click on the dropdown bar and select your user. I selected the user I created named kodi.
Once you have selected your user, click the Add button to the right of the dropdown bar.
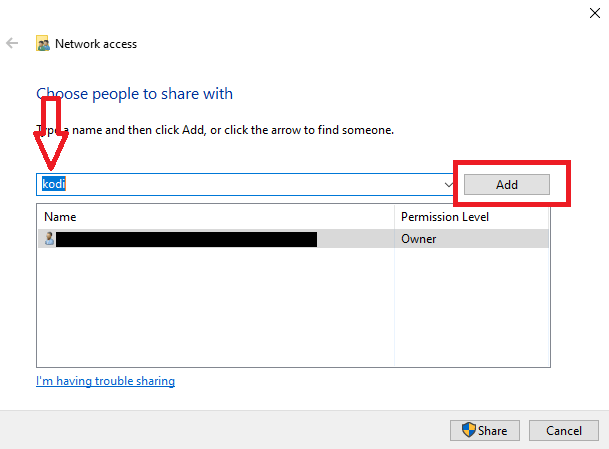
Once your user has been added to the list, click on the Share button.
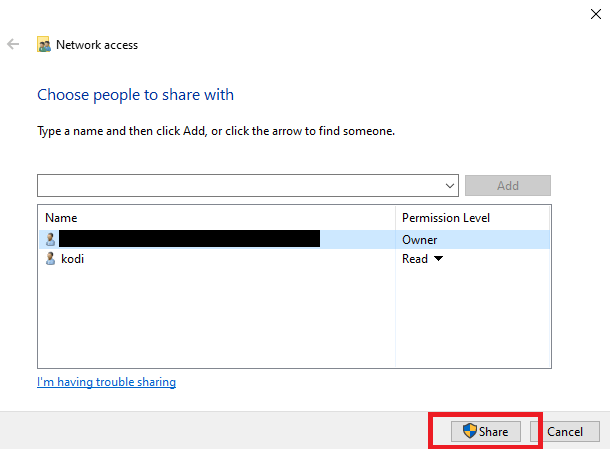
This folder you just set up is now ready to be shared via the SMB protocol. Repeat this process for any other folders you want to share. Once all folders are shared, you are finished with setting up SMB file share on Windows.
With that, a congratulations are in order, you have officially setup SMB file share on Windows. You can now move on to the devices you wish to access files on. Remember to use the user you created as the credentials when setting up SMB on those devices.
If you chose to use Everyone rather than create a new user, that user does not have a password. Some applications, such as Kodi, for example, require a password even if there isn’t an actual password. For cases such as this, use a single space as the password. If you have any questions or get stuck, please leave a comment and I’ll do my best to assist!
You May Also Enjoy





Leave a Reply